Firebase Authenticated User Trigger
The Firebase Authenticated User Trigger facilitates seamless API Calls to BuildShip from a Web Client. Leveraging the user's ID token as the authentication key, it automatically rejects unauthenticated requests, ensuring robust security measures.
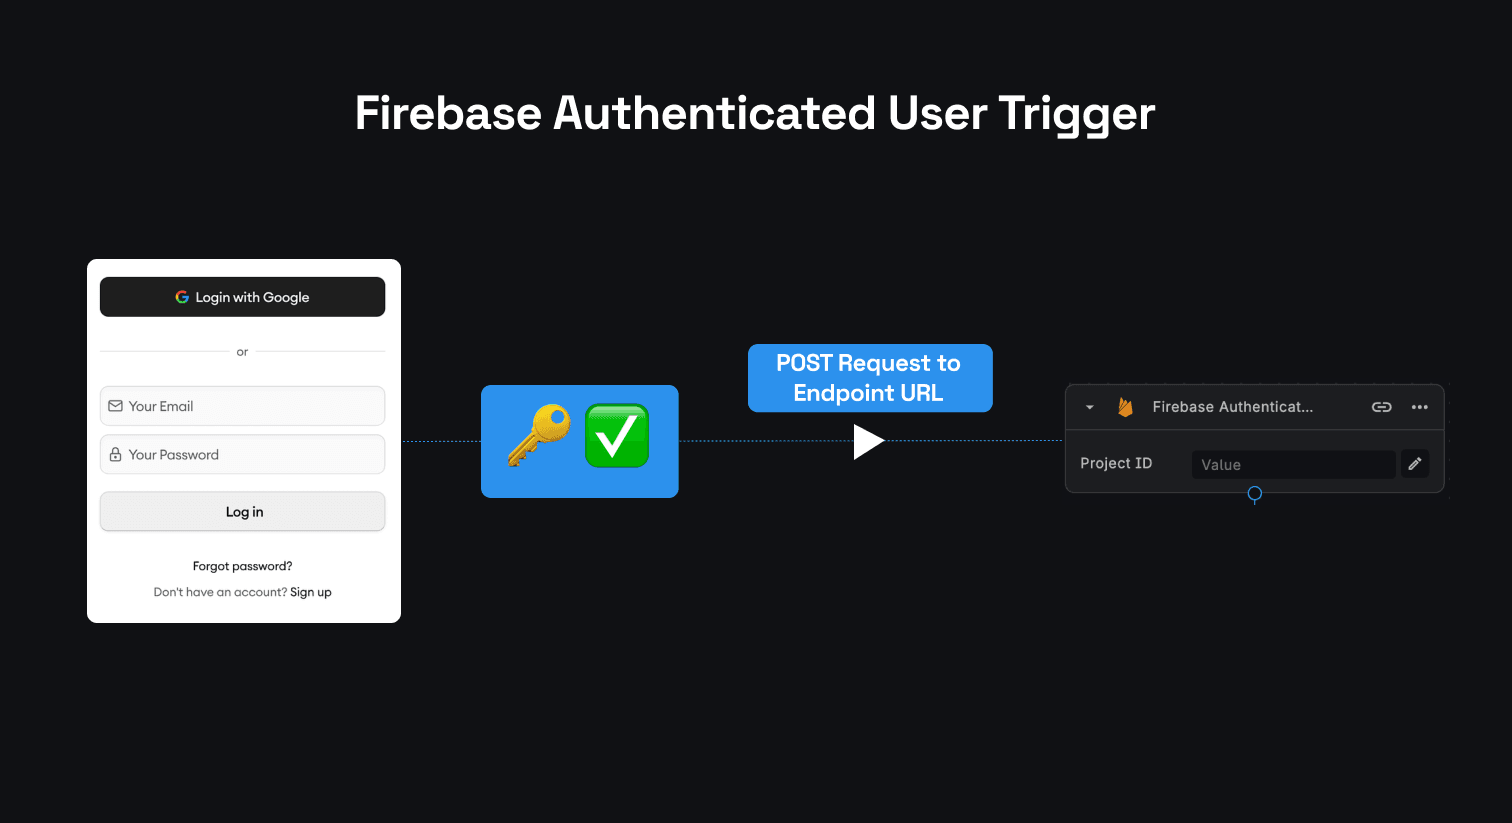
This mechanism ensures that only authenticated users of your application can send requests to your API endpoint.
Prerequisites ✅
- A Frontend Application / Web Client integrated with Firebase Authentication. Users must pass the end-user's ID token in the headers to authenticate the request.
Understanding the Mechanism
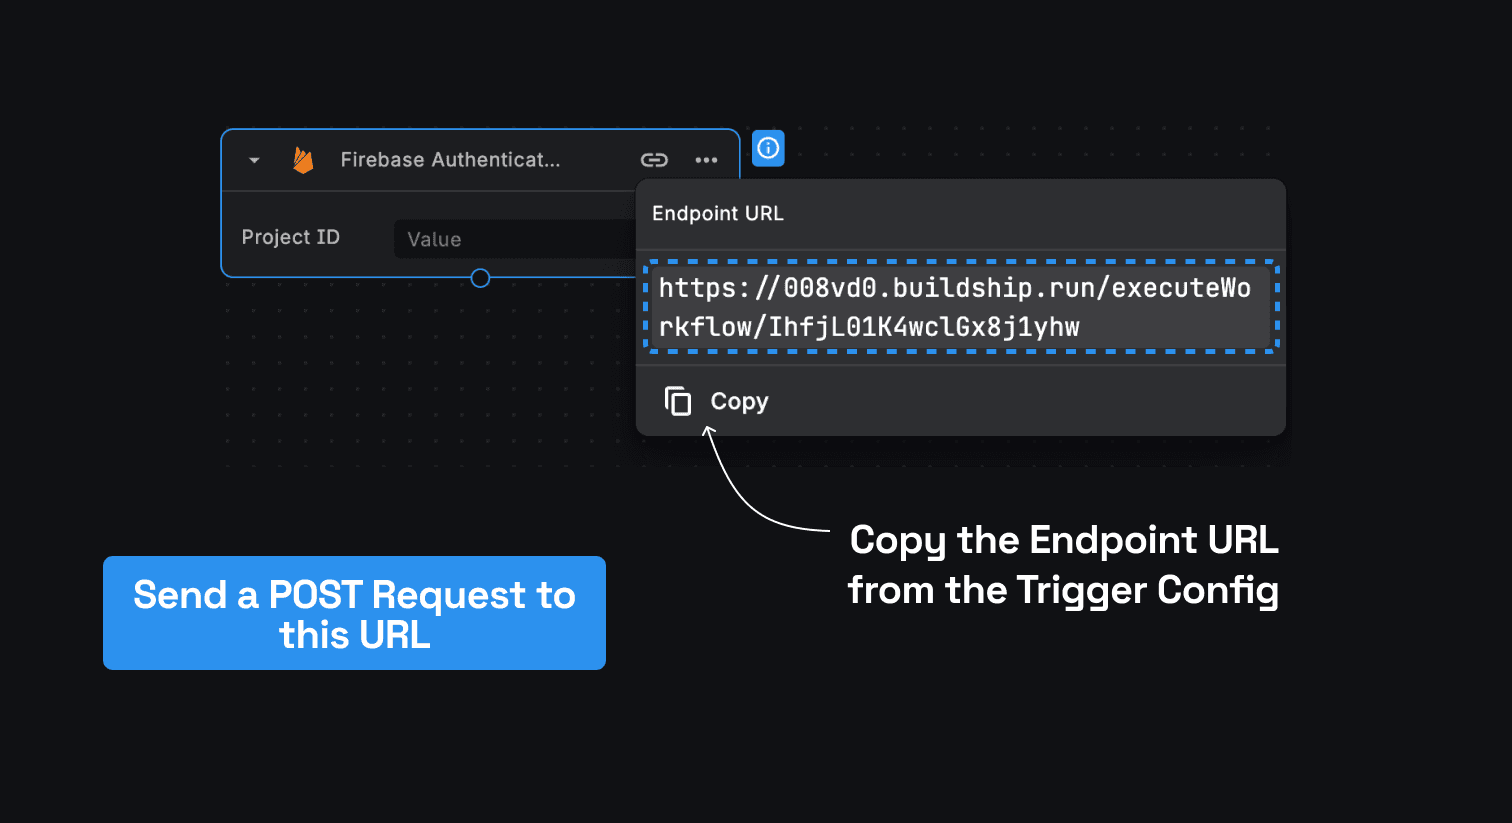
This trigger functions similar to the REST API Call Trigger. It necessitates a POST Request sent to the Endpoint URL provided by the Firebase Auth Trigger config. The Request Structure is outlined below:
Request Method
A POST Request is mandatory for the Endpoint URL provided by the Firebase Auth Trigger. This URL can be retrieved from the Firebase Authenticated User Trigger configuration.
Request Headers
The request headers must include the Authorization Header, where the value should be the user’s ID Token received
post successful user authentication within your Web Client. Additionally, the Content-Type should be set to
application/json.
For more details about Firebase ID Tokens, refer to the documentation here (opens in a new tab).
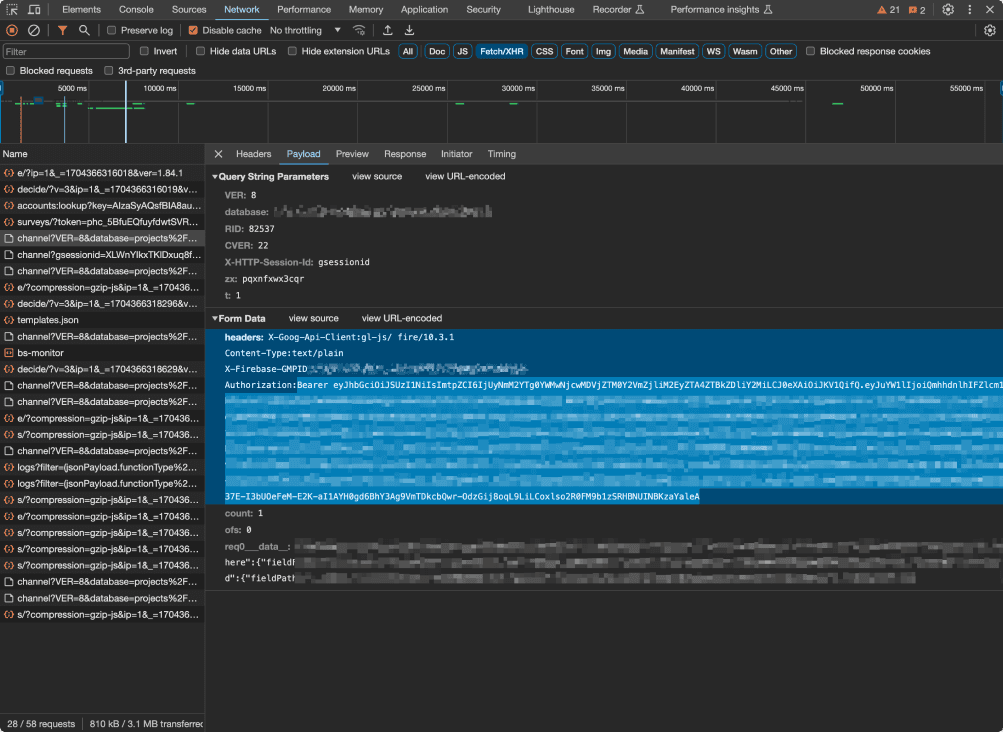
For testing purposes, users can conveniently copy and paste their token from the network tab.
SAMPLE INPUT:
Authorization: 'Bearer eyJhbGciOiJSUzI1NiIsImtpZC...',
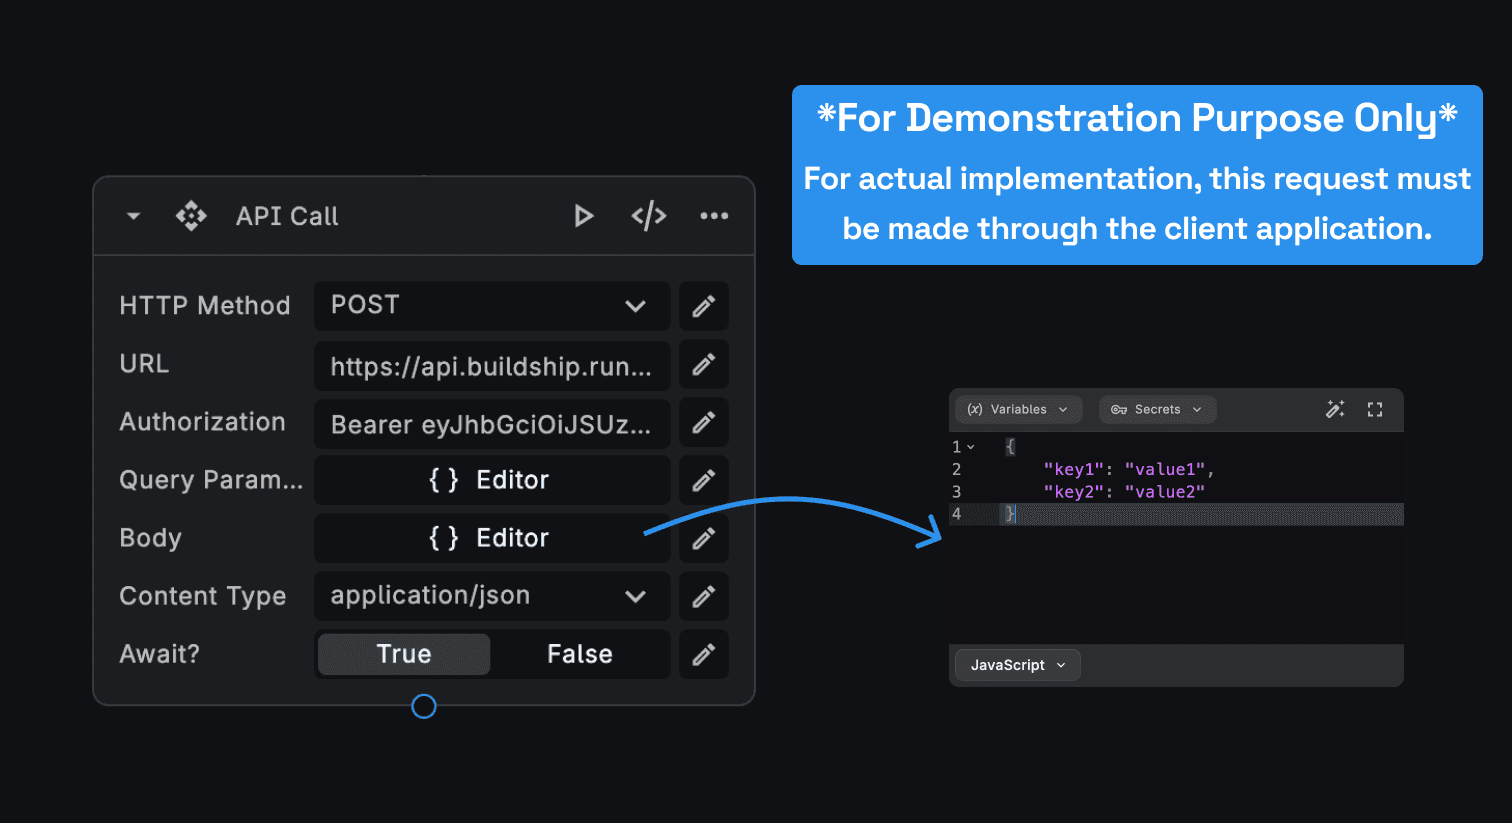
'Content-Type': 'application/json'Request Body
Users have the option to pass any desired data to be accessed within the Workflow associated with the Firebase Auth Trigger. This data format must adhere to a JSON Object.
SAMPLE INPUT:
{
	"key1": "value1",
	"key2": "value2"
}
Here’s an example demonstrating a similar request using the API Call Node in BuildShip. However, for actual implementation, this request must be made through the client application.
The Firebase Authenticated User Trigger
In a blank workflow, click on “Add Trigger” button and select the “Firebase Authenticated User” trigger.
The Project ID input is required for configuring the trigger for your project.
Firebase Project ID
Users must specify the Firebase Project ID utilized by their client application. This trigger initializes authentication and validates the token passed in the request.
If no Project ID is provided, the Trigger employs the default Project ID linked with your BuildShip Project.
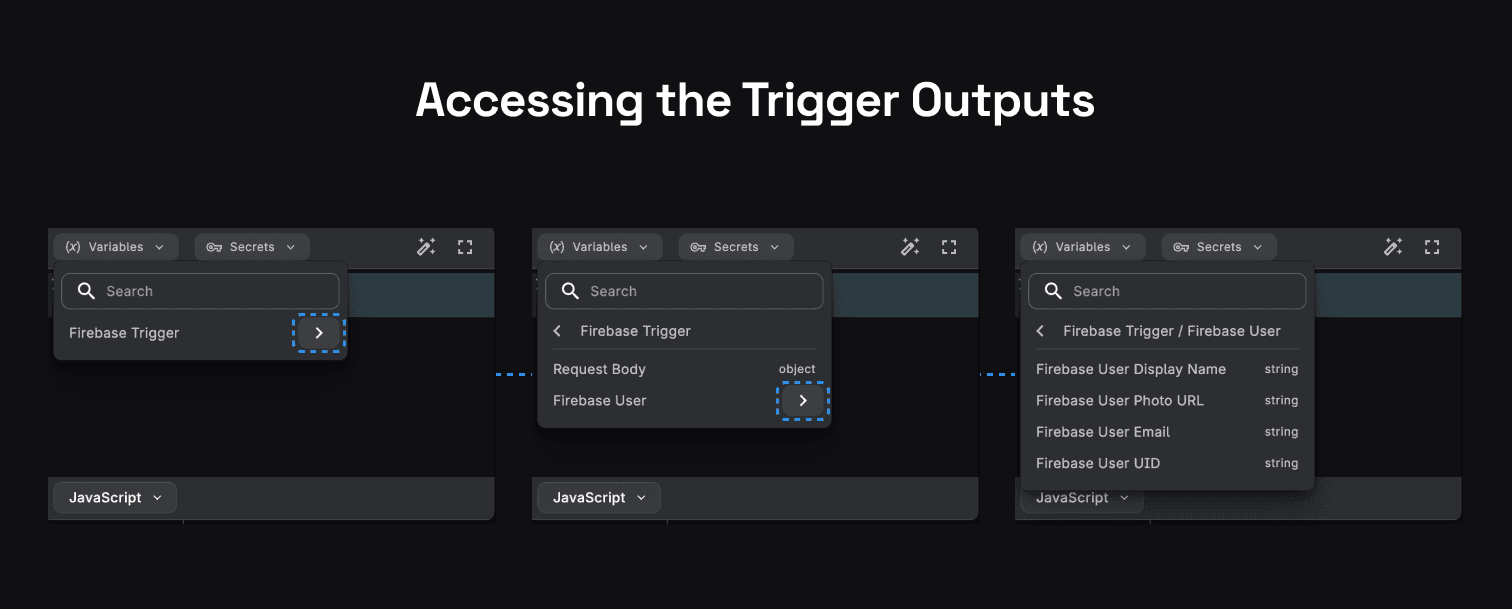
Trigger Outputs
Once the trigger is correctly configured, users will be able to access the Request Body passed via the POST Request made to the endpoint, along with the Firebase User details.
The Firebase User Details include the Display Name, Photo URL, Email, and UID.
All these outputs can be accessed as variables using the Context Menu in the Editor.
Example Workflow
Consider a scenario where we aim to generate custom tokens for users whose emails end with a specific domain, such as
@buildship.com. Let's outline the steps for achieving this:
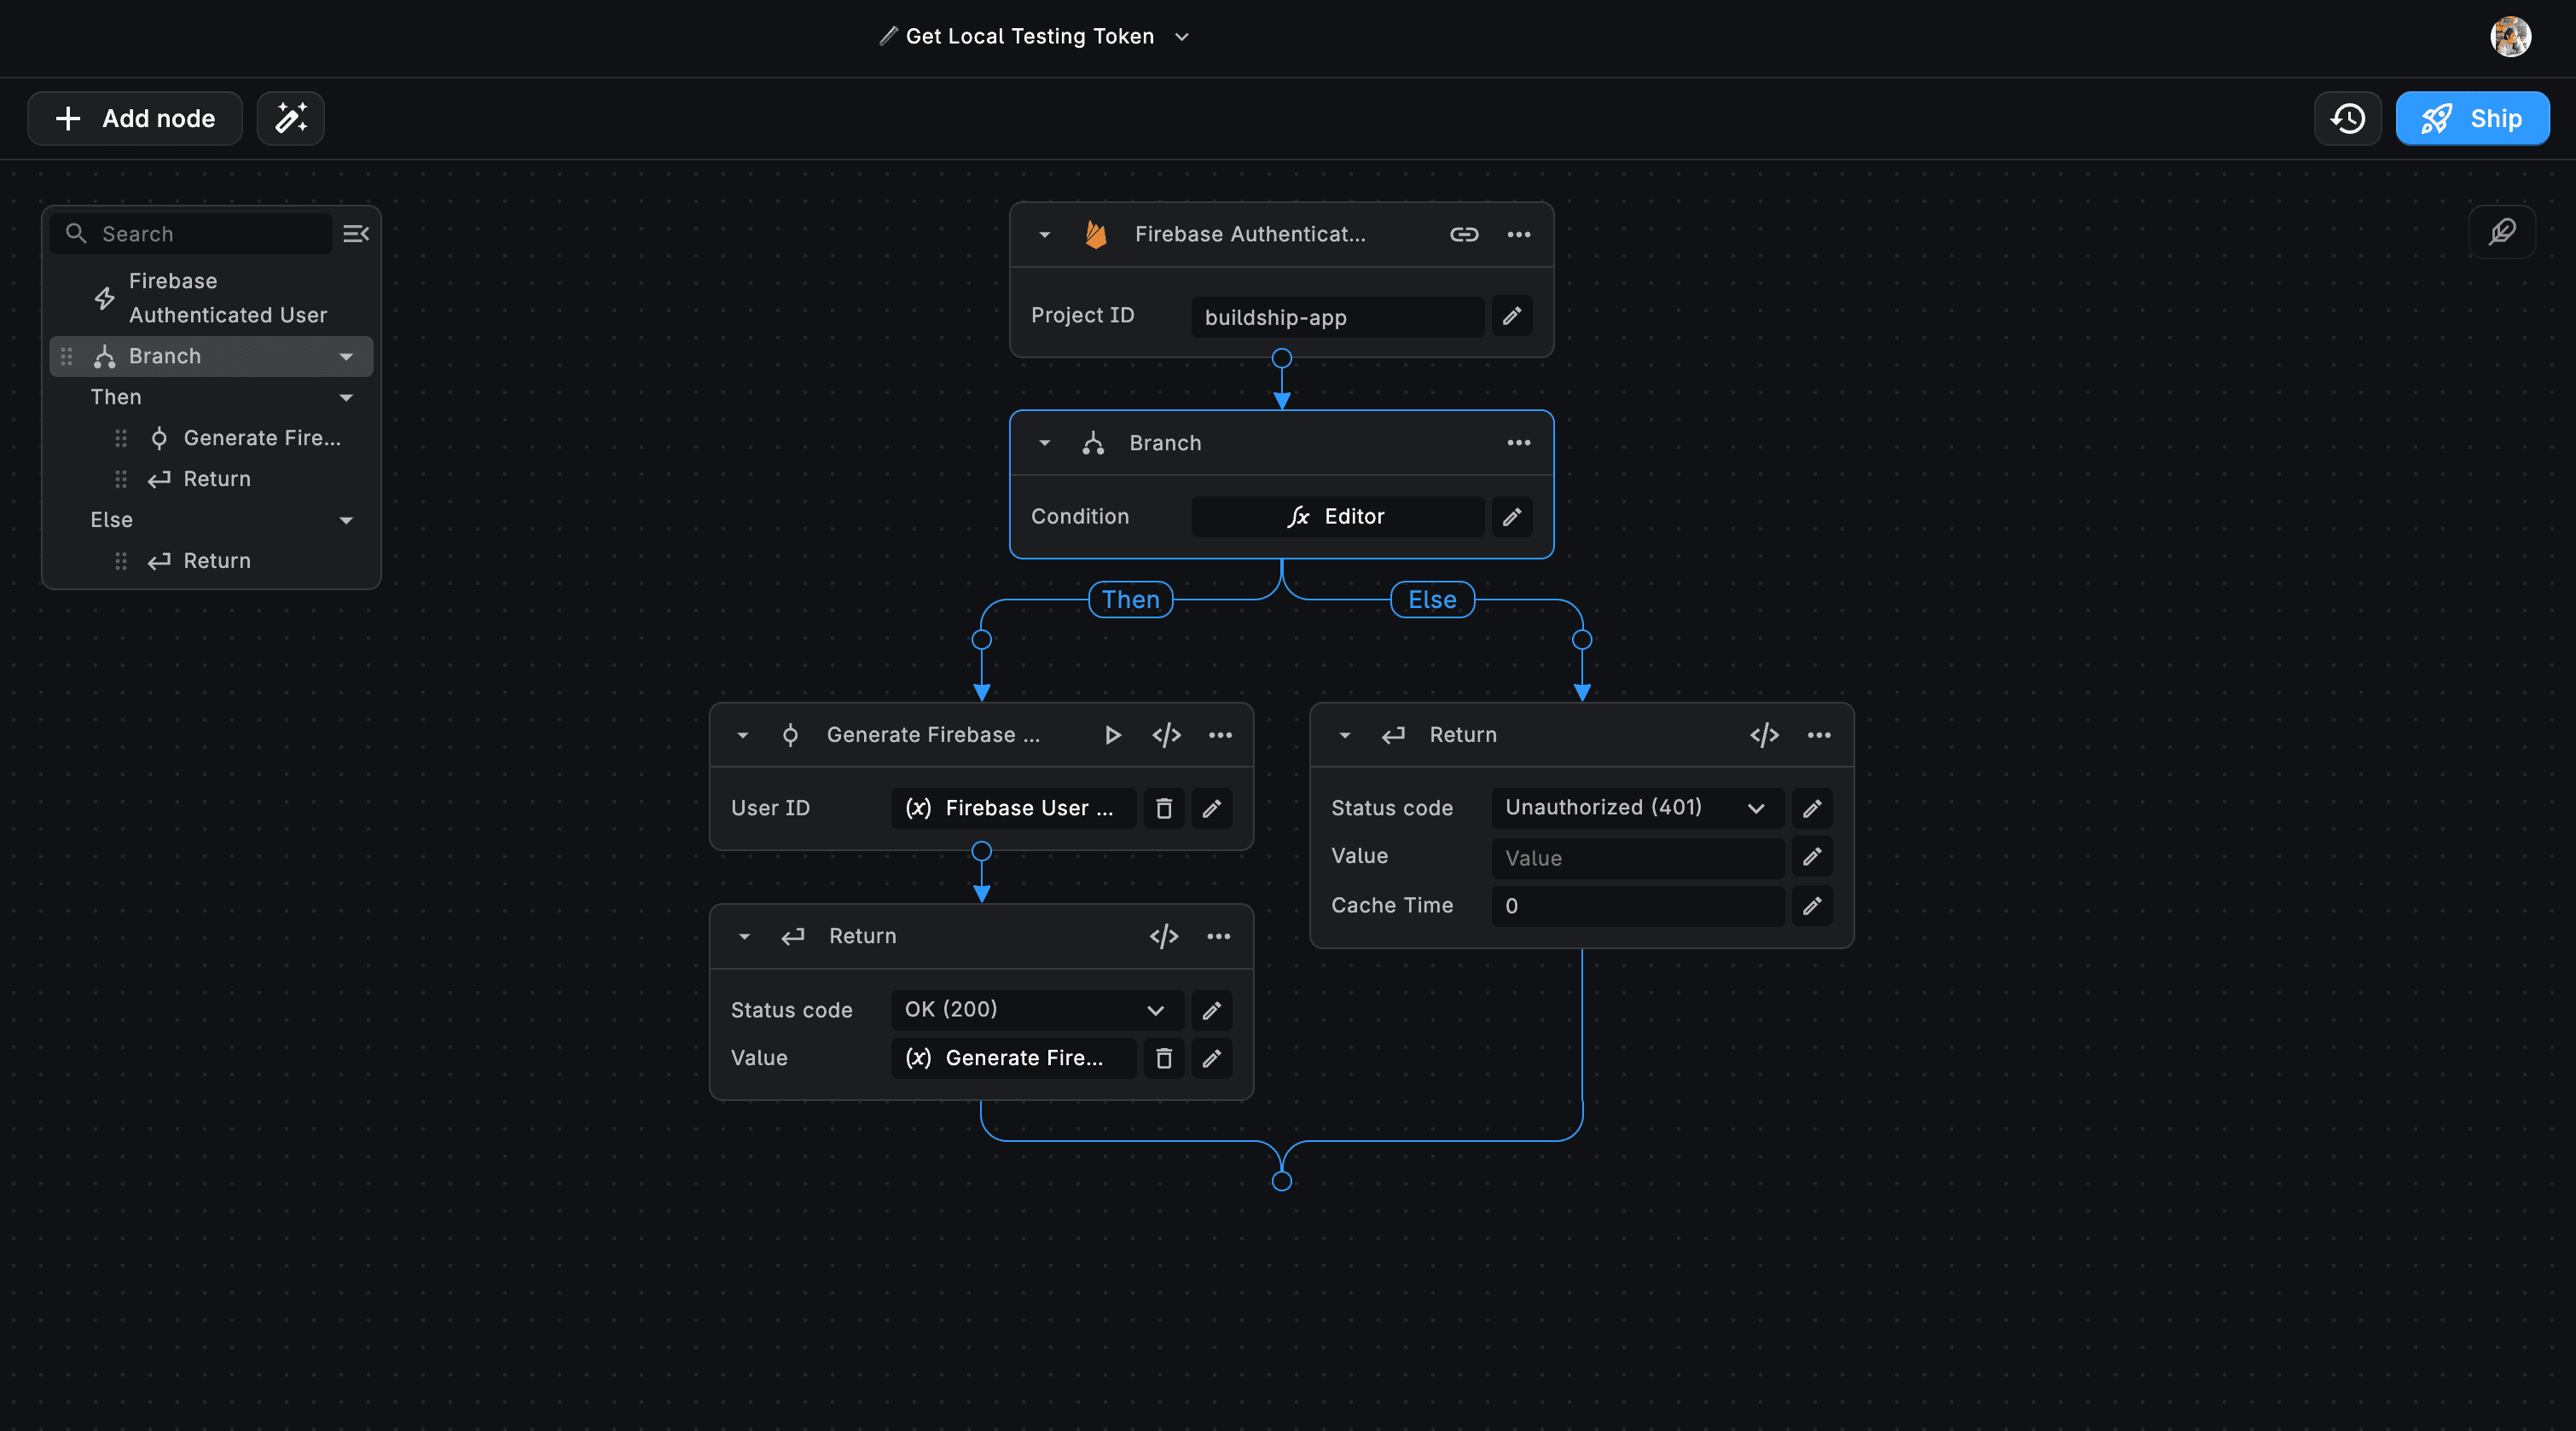
Firebase Authenticated User Trigger
Add the Project ID associated with the client that authenticates the user and generates the ID Token.
Branch Node
Set up a Branch node in the workflow to evaluate whether the Firestore User Email includes @buildship.com. Paste the following condtion in the Editor:
ctx["root"]["firebase-trigger"]["user"]["email"].includes("@buildship.com")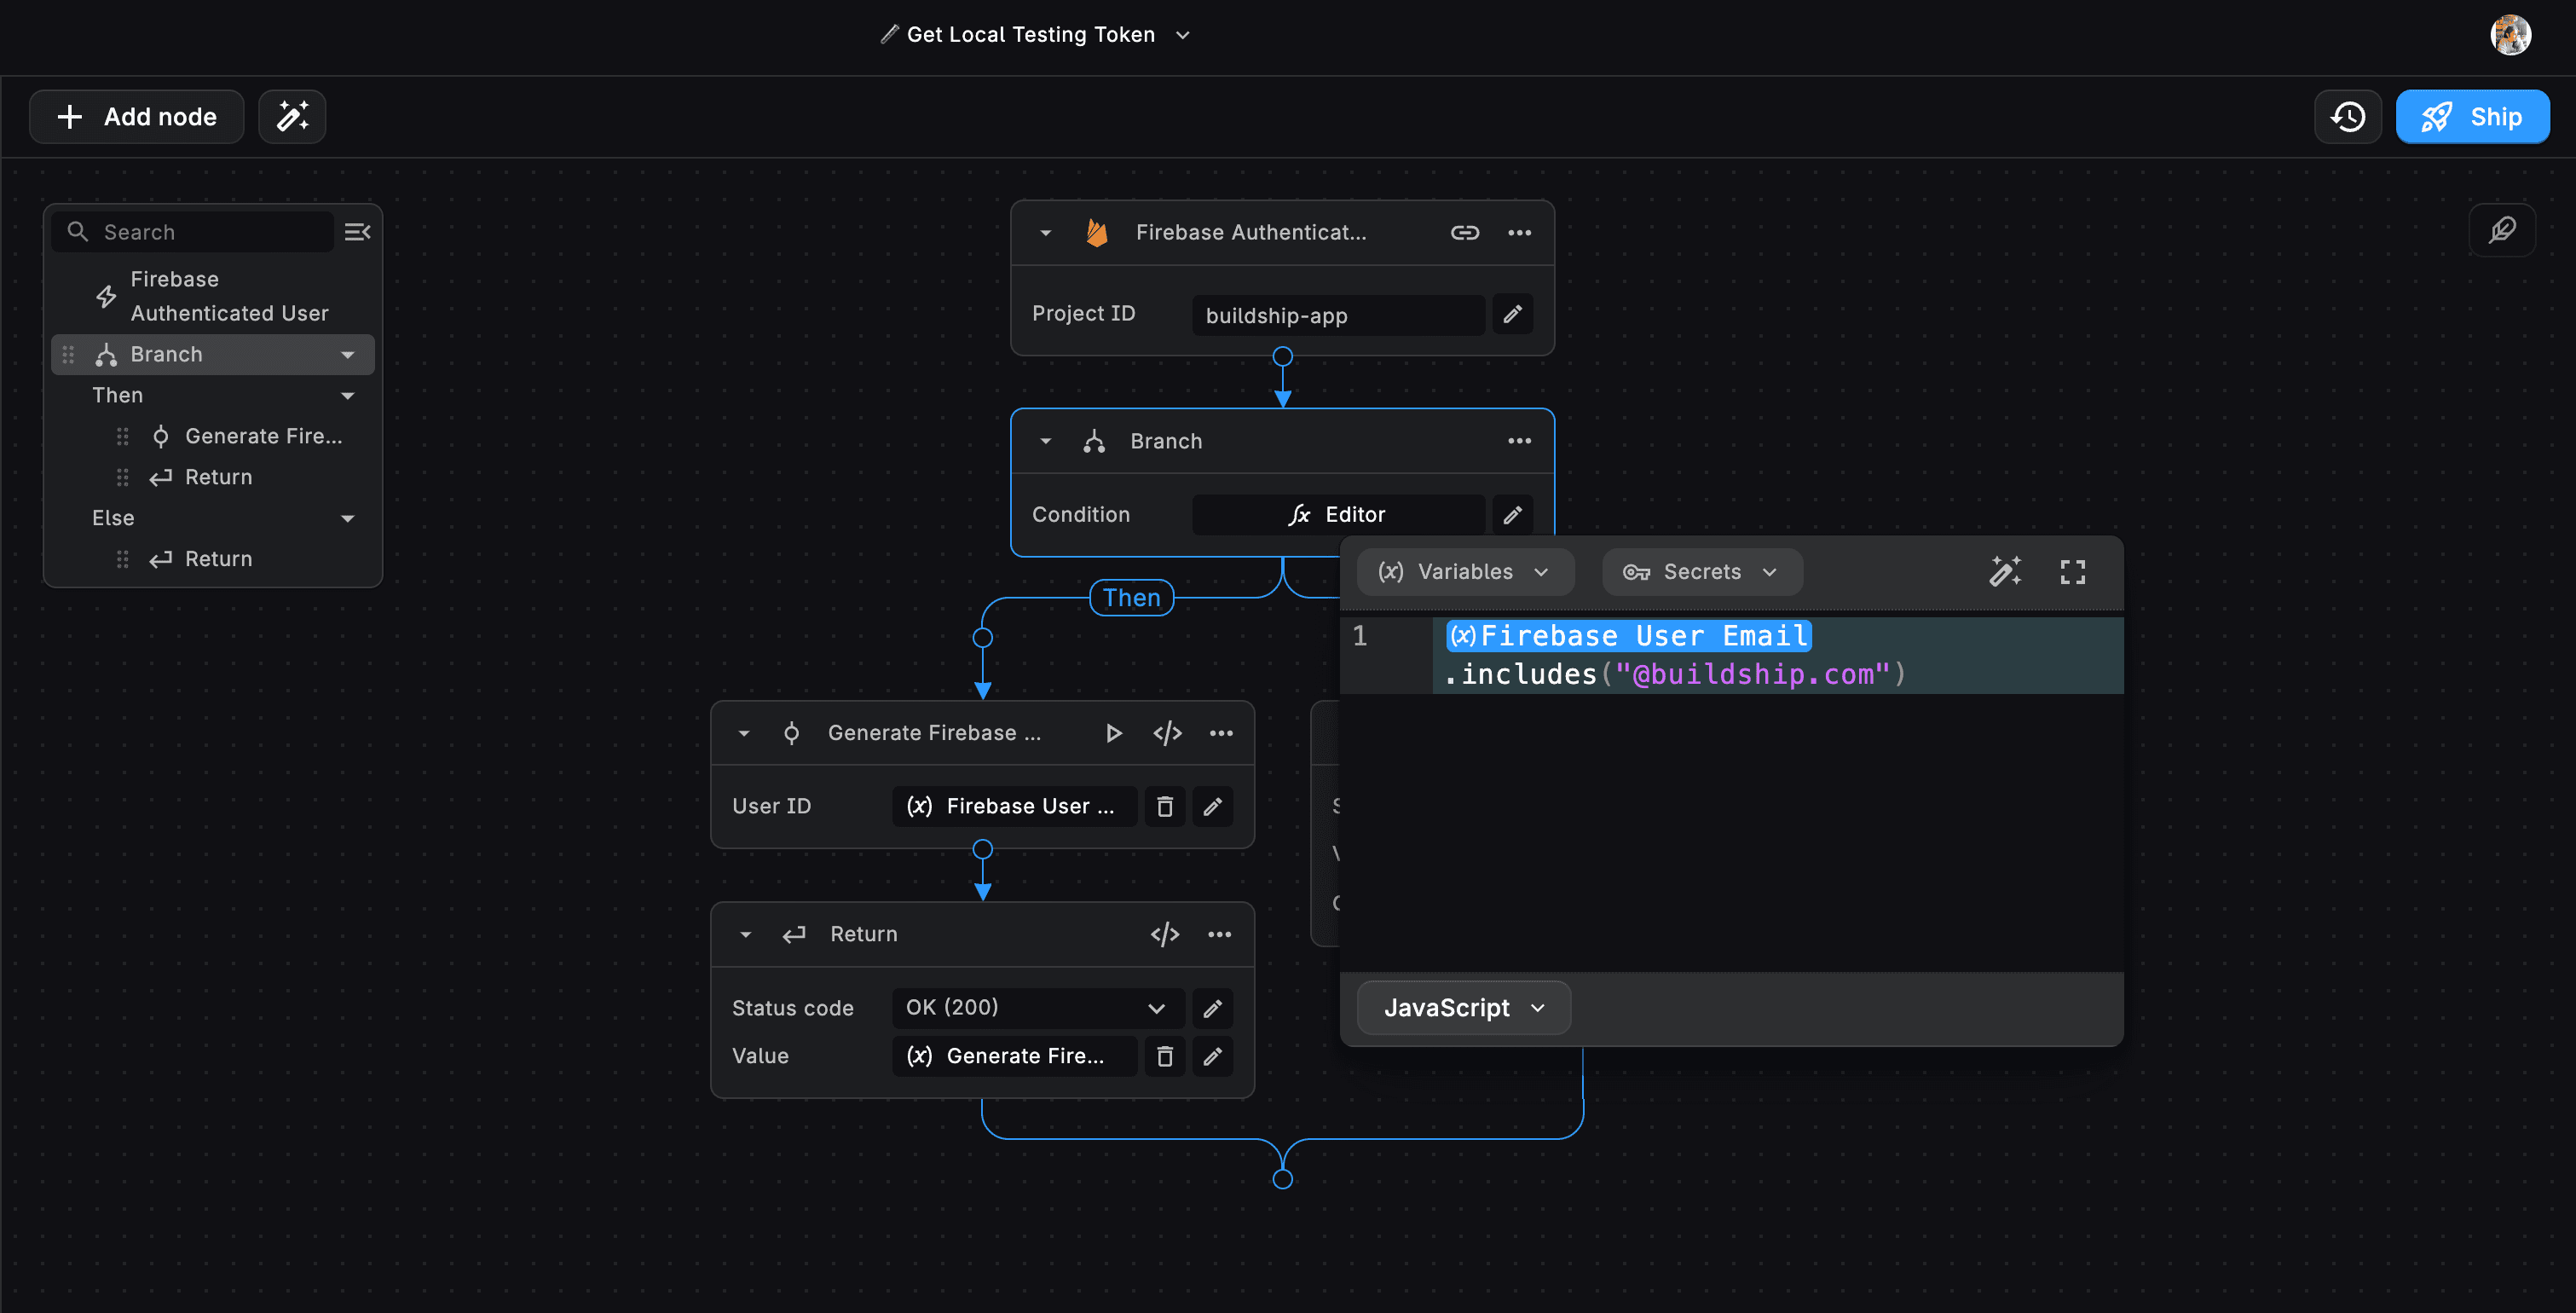
Conditional Workflow Execution
If the user's email matches the condition (@buildship.com), proceed with generating a custom Firebase Token for the
user's UID.
If the condition is not met, return a response with a status code of 401 - Unauthorized Request.
This workflow ensures that only users with email addresses ending in @buildship.com receive custom Firebase Tokens, allowing controlled access to specific functionalities or resources within the application.