BuildShip Tables
BuildShip Tables give you an easy visual way to manage your BuildShip Database. Every BuildShip project comes with a ready-to-use Firestore database.
With BuildShip, you get the ultimate flexibility to choose the database that best works for your project.
- Use BuildShip Database: If you are looking for quick and ready-to-use database with an instant database management UI.
- Pick Your Own Database: Firestore, Postgres, Supabase, MySQL….or any database. Choose a database that works for you if you do not want to use the BuildShip database. In this case, you can simply use them in the workflows and APIs using CRUD nodes.
How to use BuildShip Table
If you're using the BuildShip database, by using the BuildShip Database nodes in your workflows, you can access BuildShip Tables to visualize and manage the data populated by these nodes.
BuildShip Tables are available only on Pro plan or above. You can still use BuildShip database in your workflows using the CRUD nodes but will not have access to the Tables in Free or Starter plans.
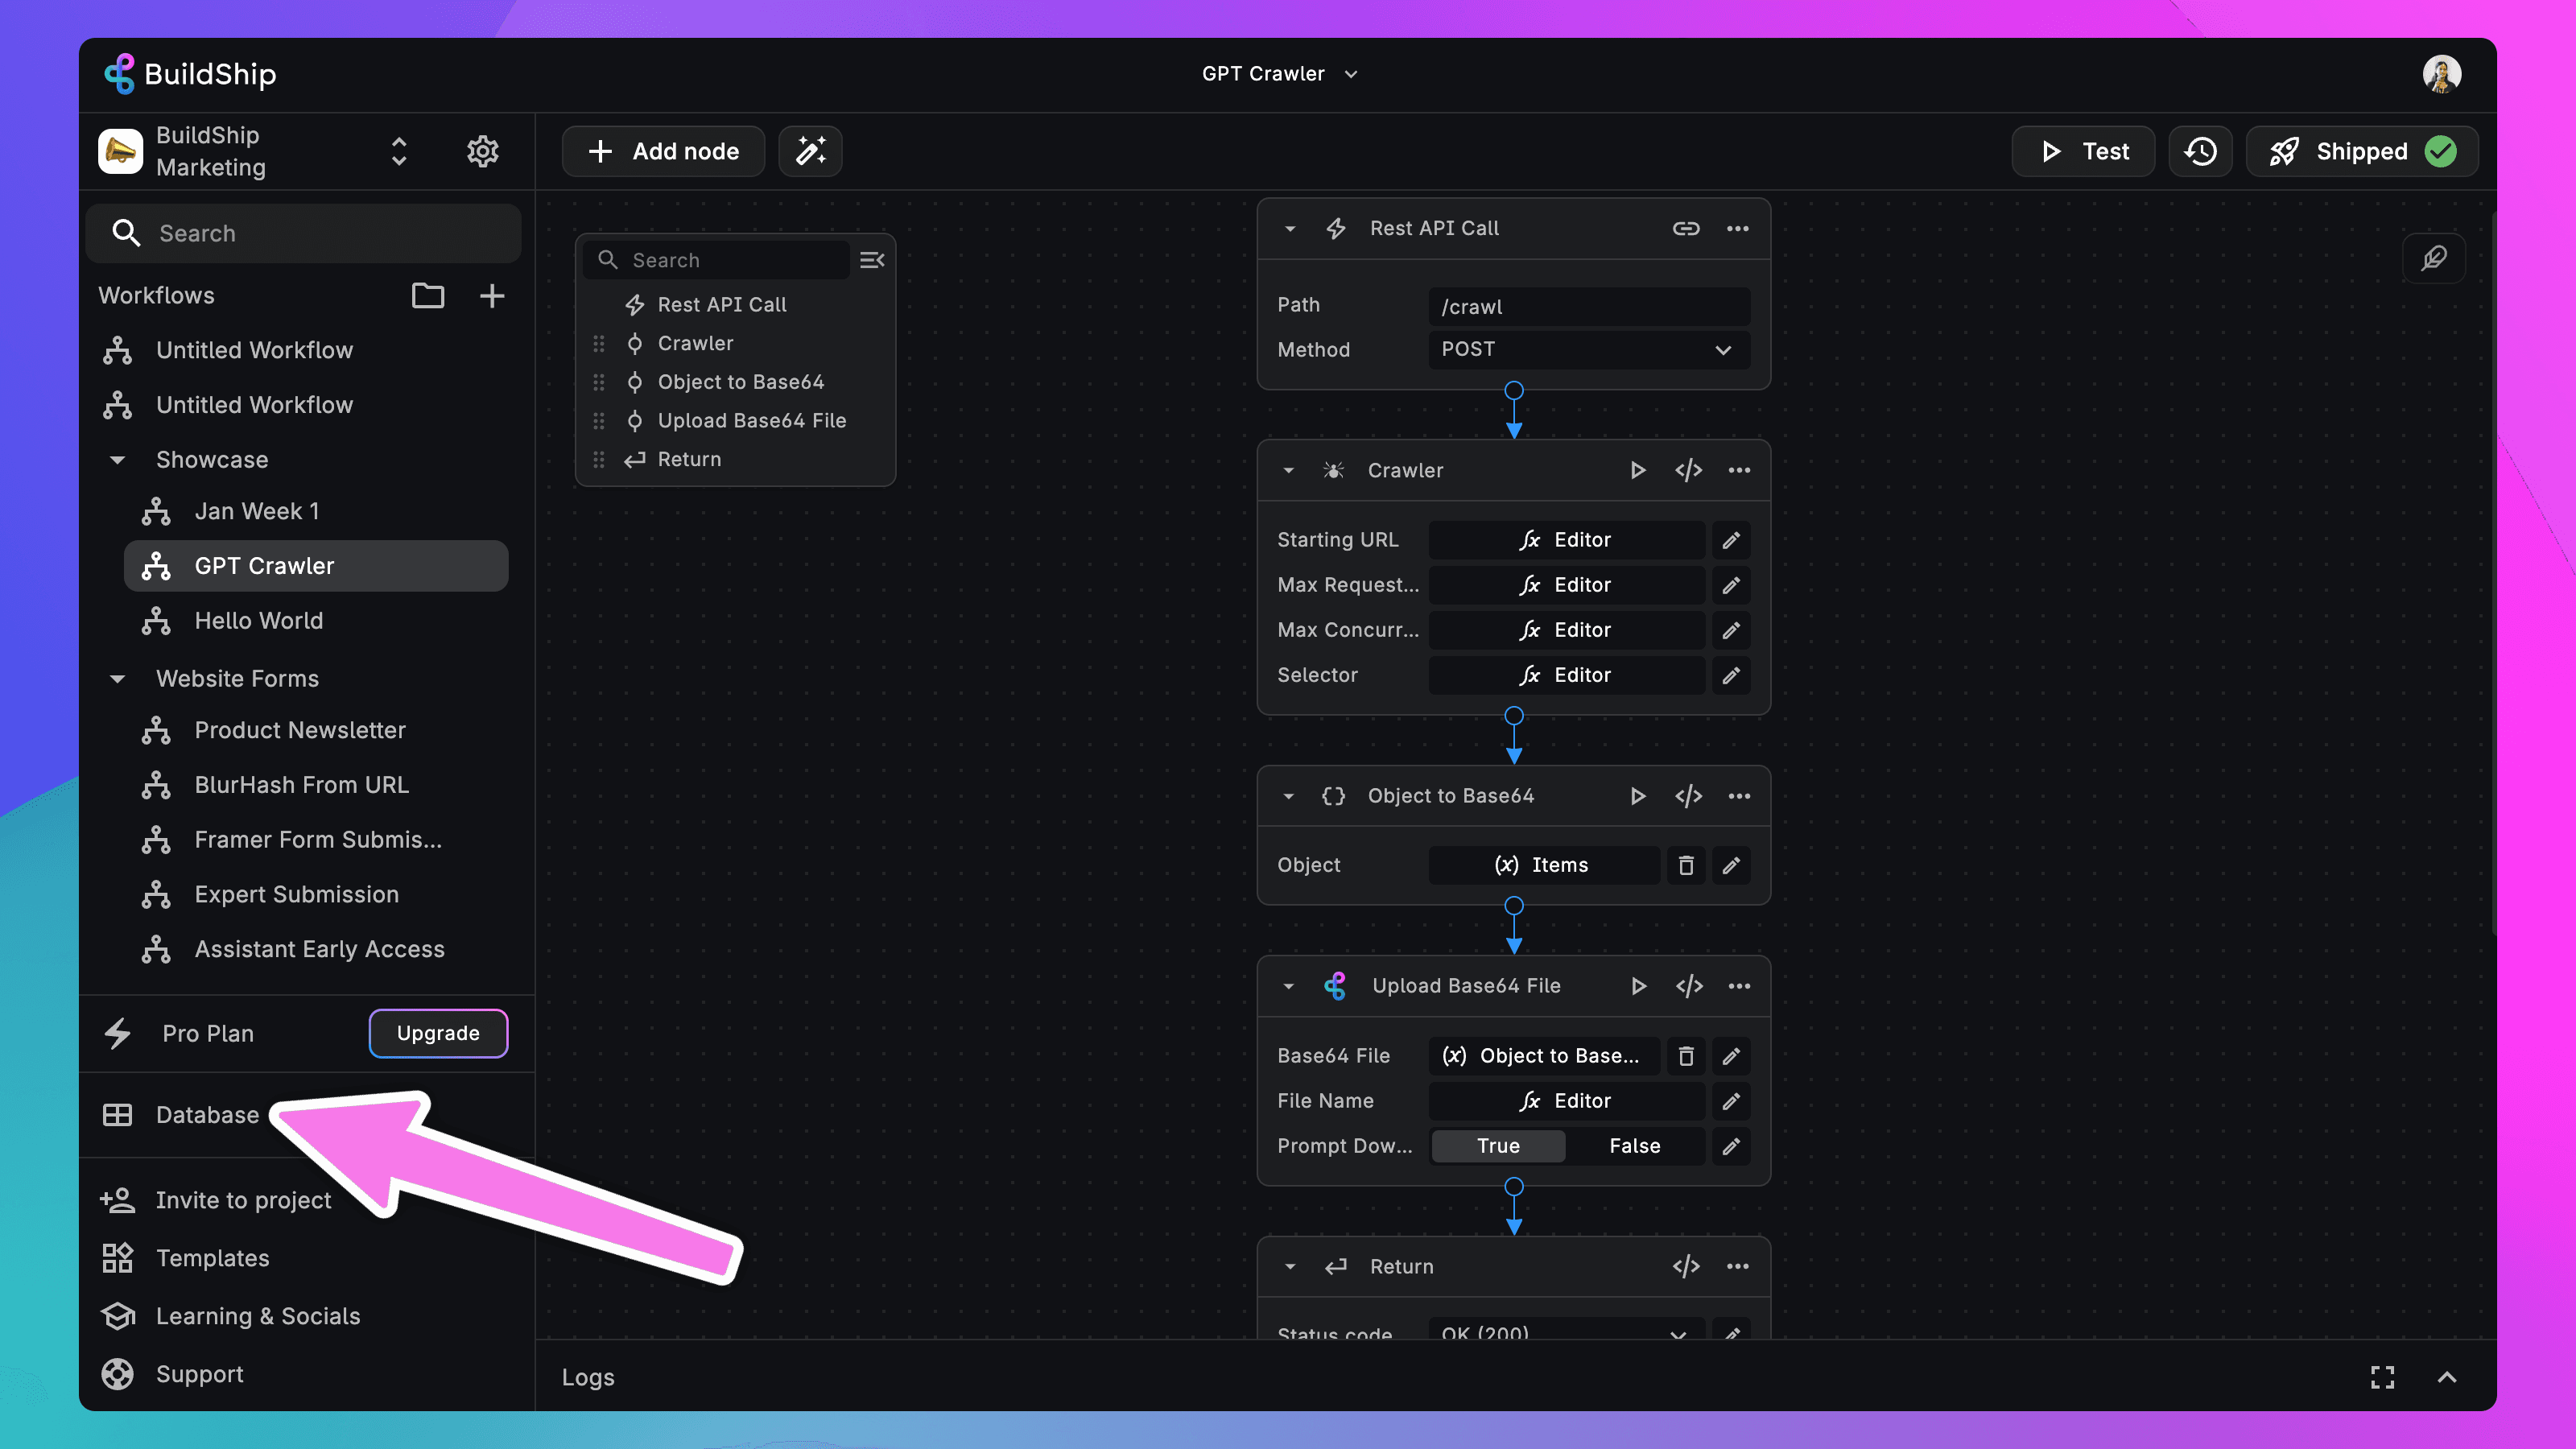
Access BuildShip Table
You can access BuildShip Tables directly from the CRUD node you are using. Once you click on the table icon available on the BuildShip Database node, you'll be prompted to create a new table or select an existing table.
This will be shown only to users on the Pro plan or above.
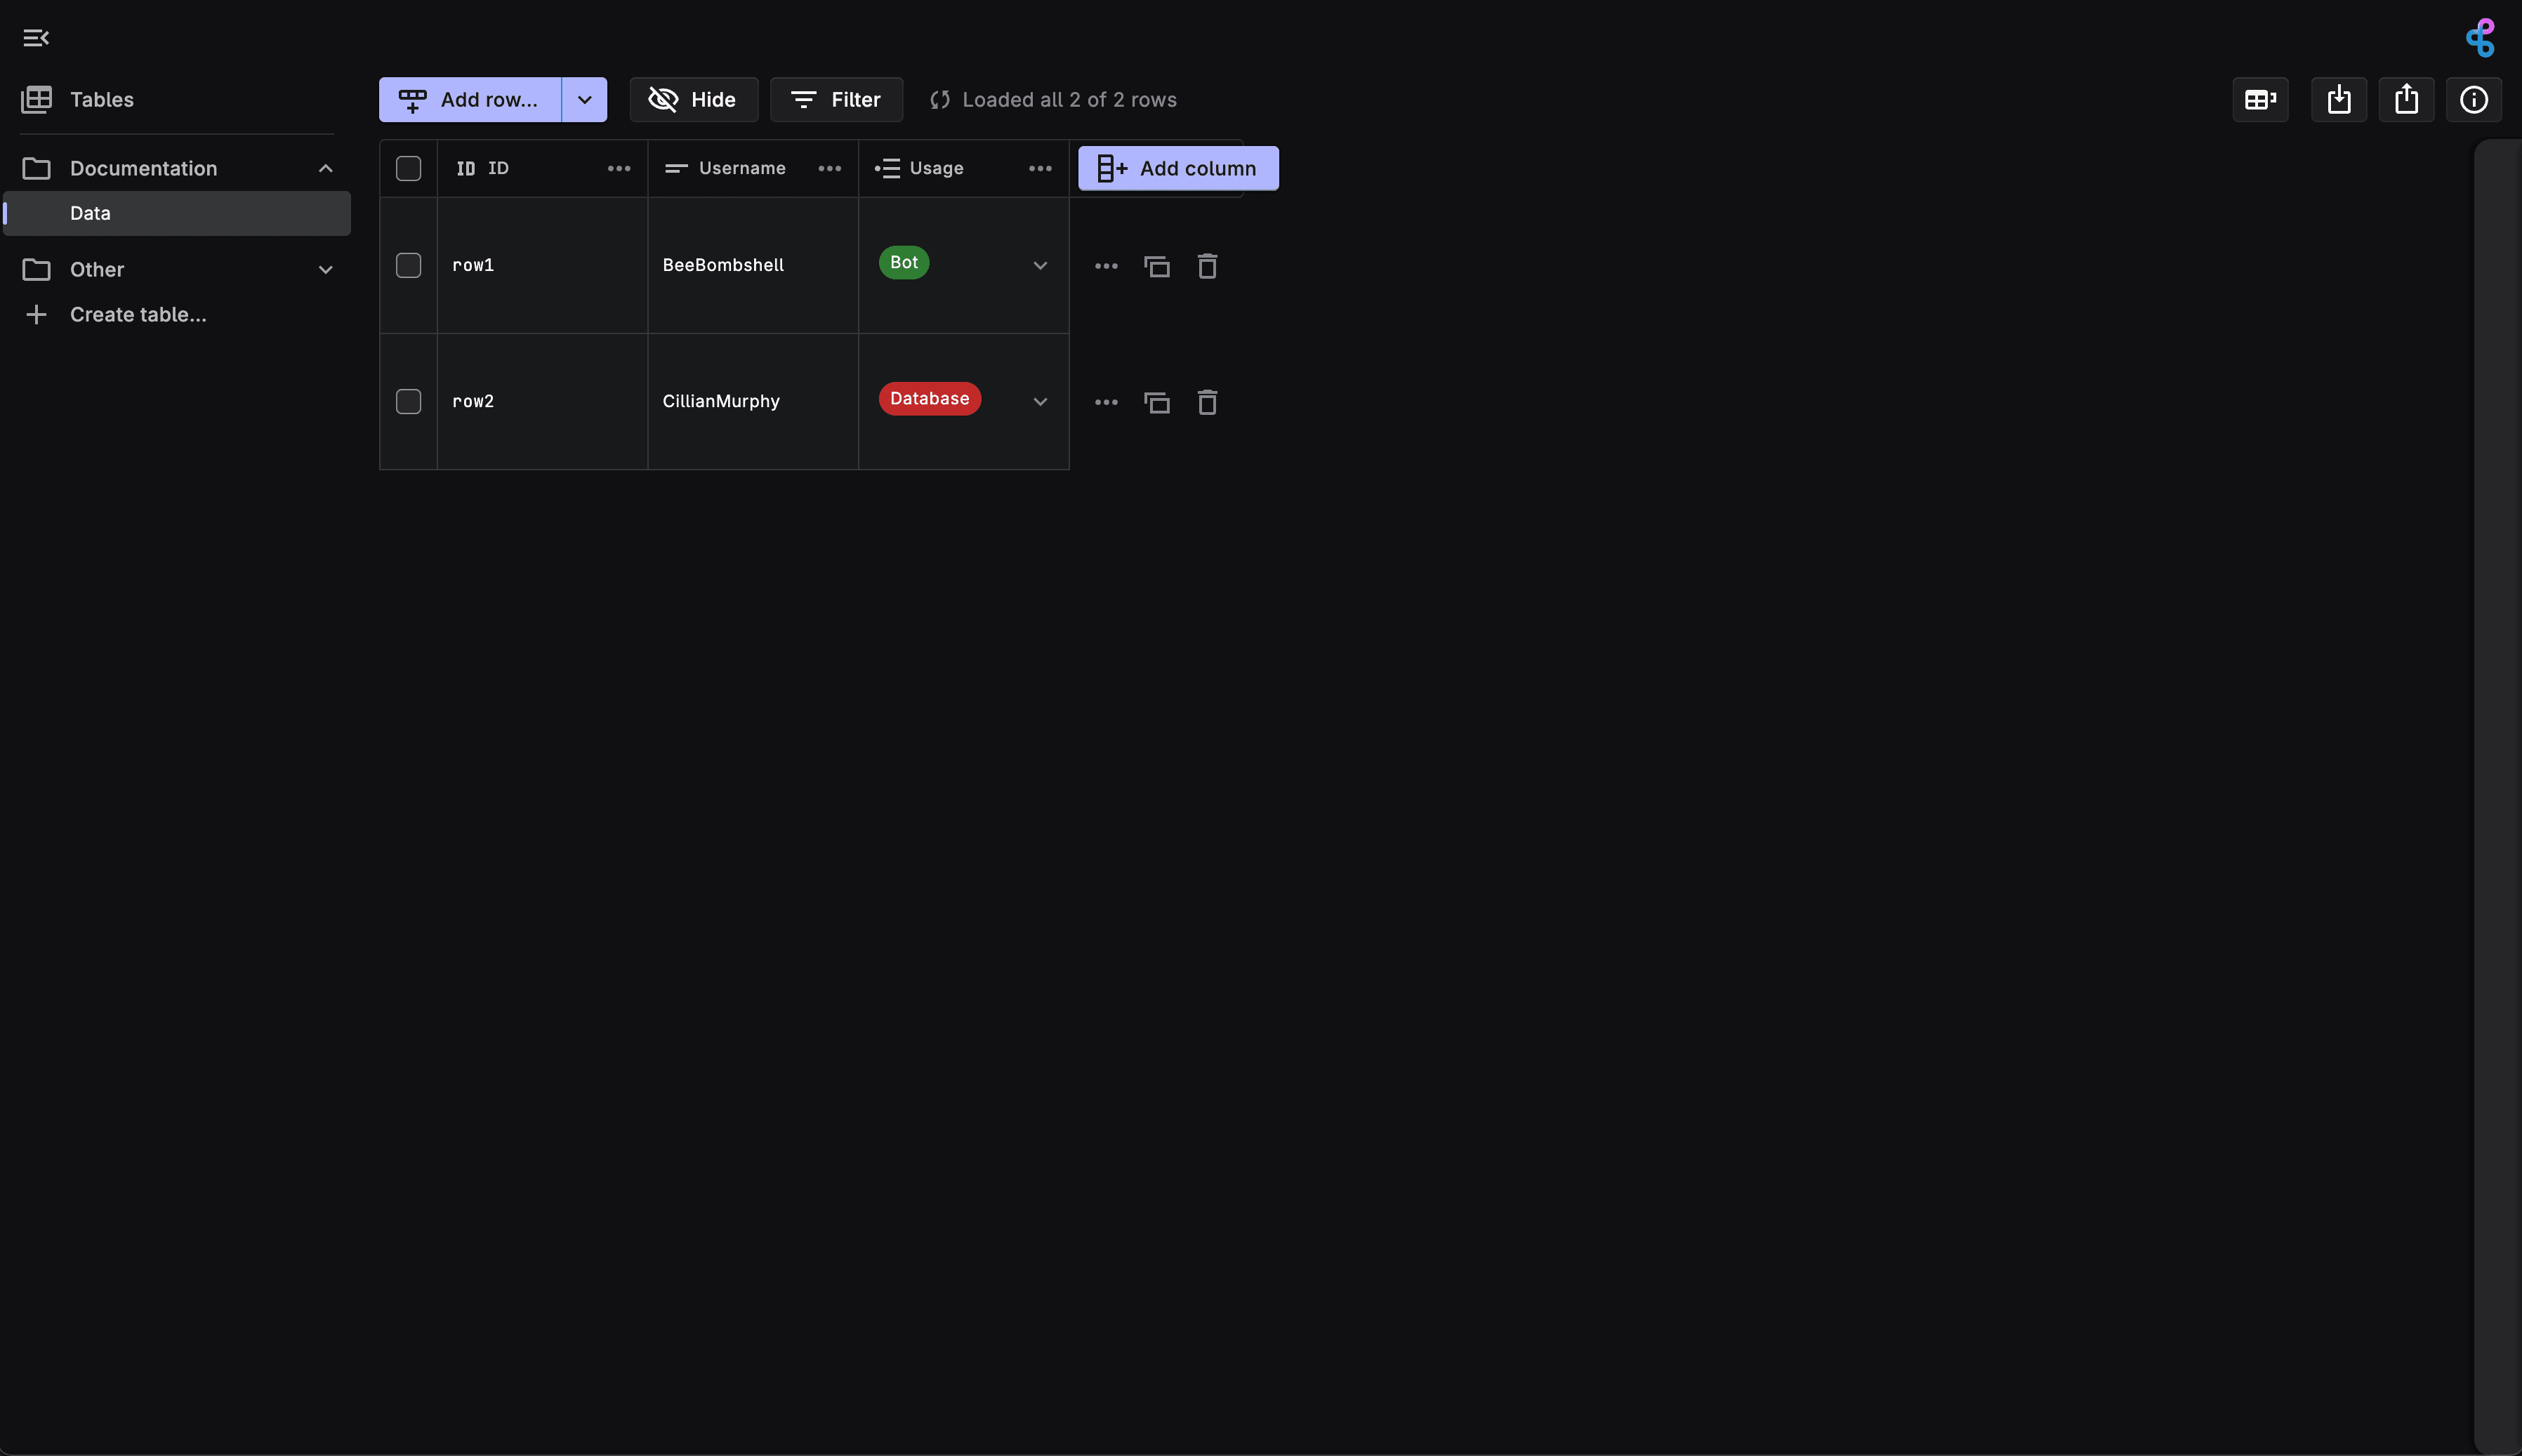
Alternatively, you can access BuildShip Tables from the side navigation bar. Click on the Database icon to access the BuildShip Tables.
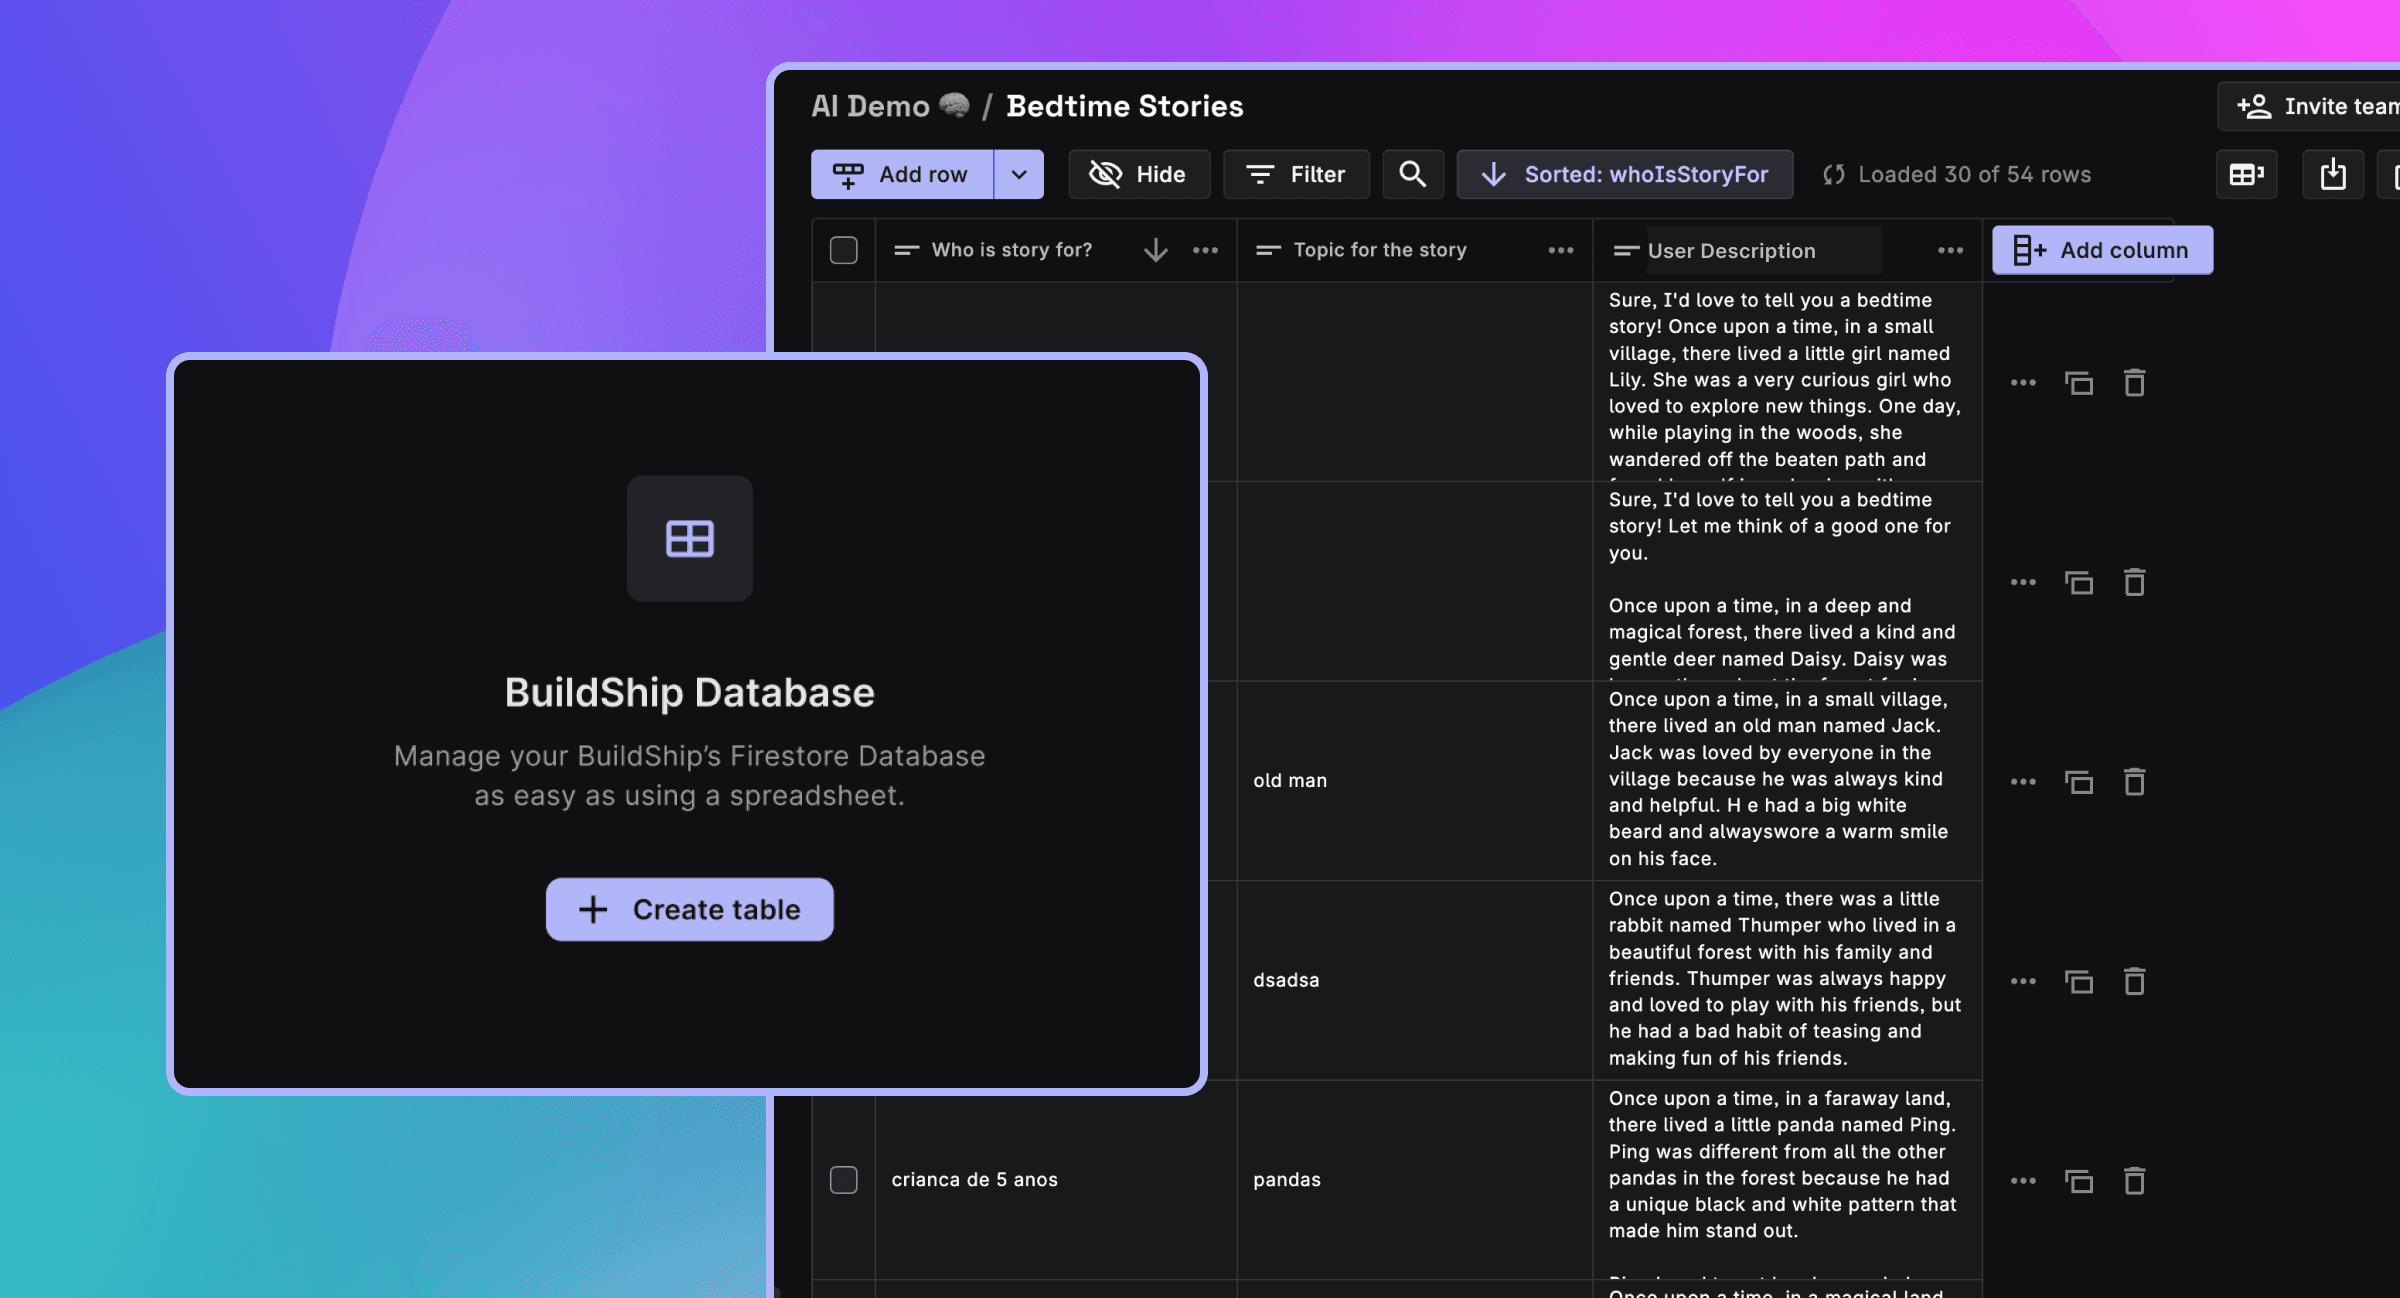
Creating Tables
There are two ways of creating a BuildShip Table:
Set up an existing collection
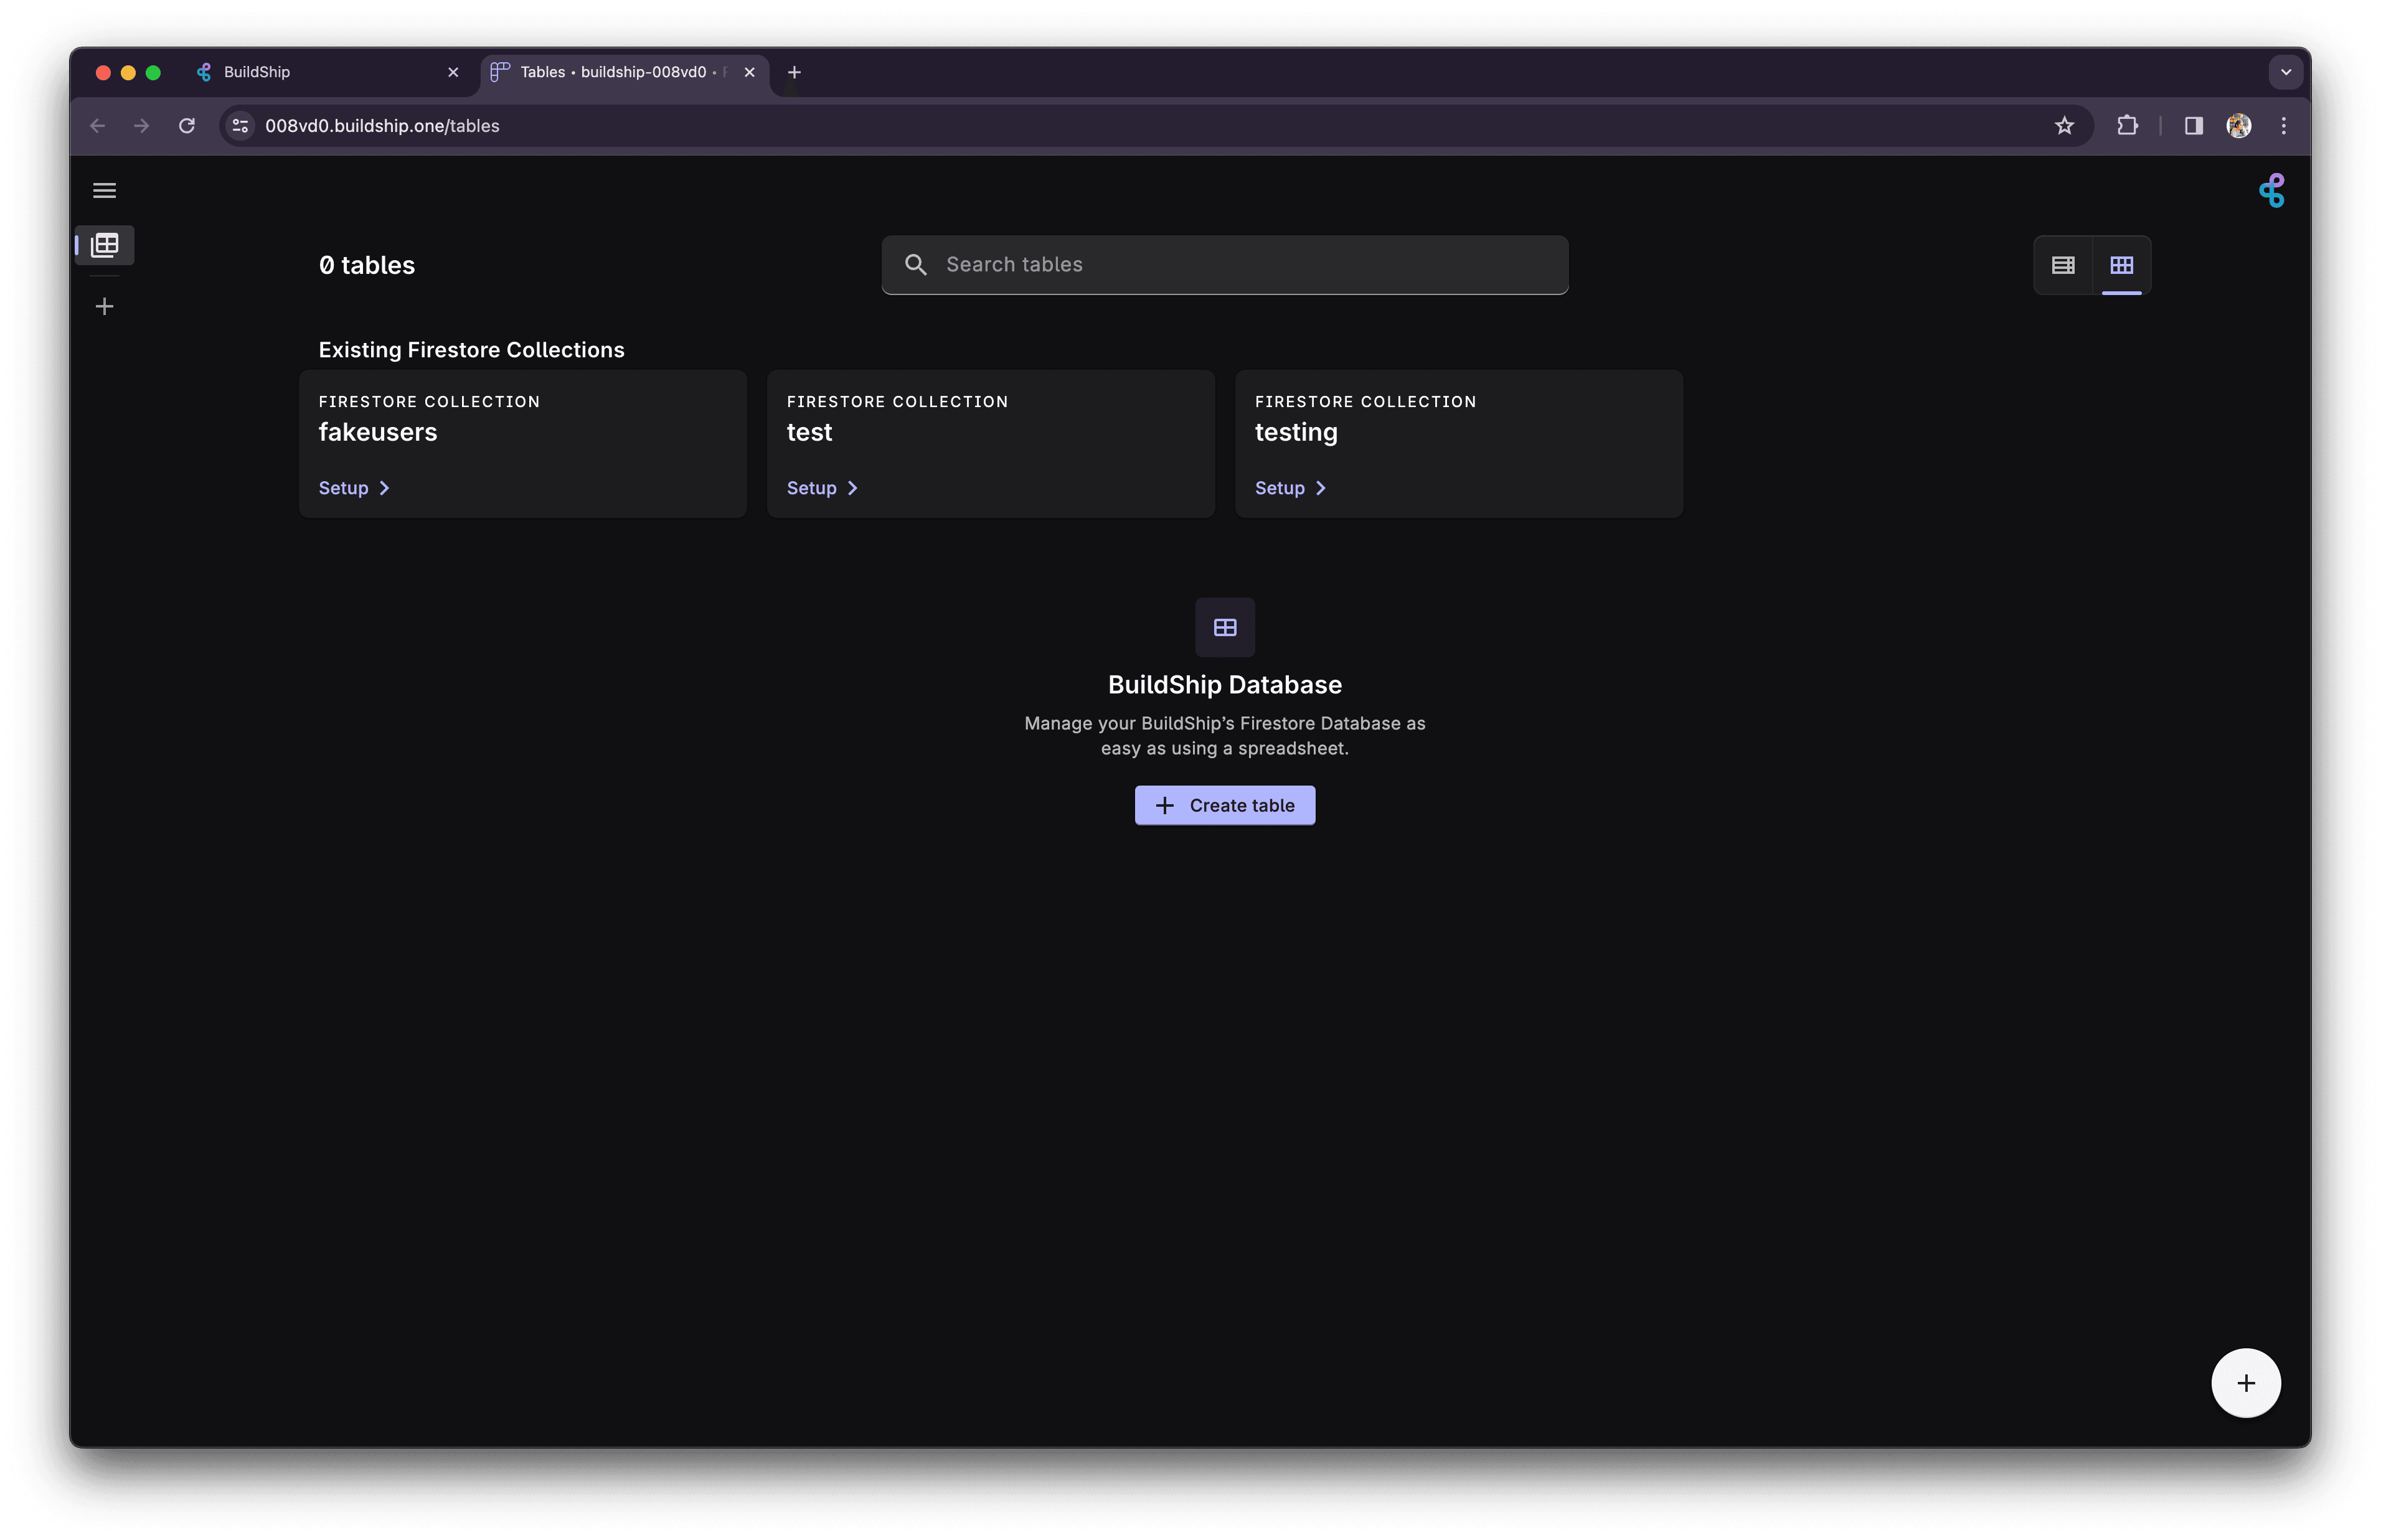
After navigating to the Databases tab, users will be able to check out the existing collections as tables, if any. If you do not have any existing tables, proceed to the Creating a new table section.
- To initialize an existing collection as a BuildShip table, simply click on the Setup ➤ button.
-
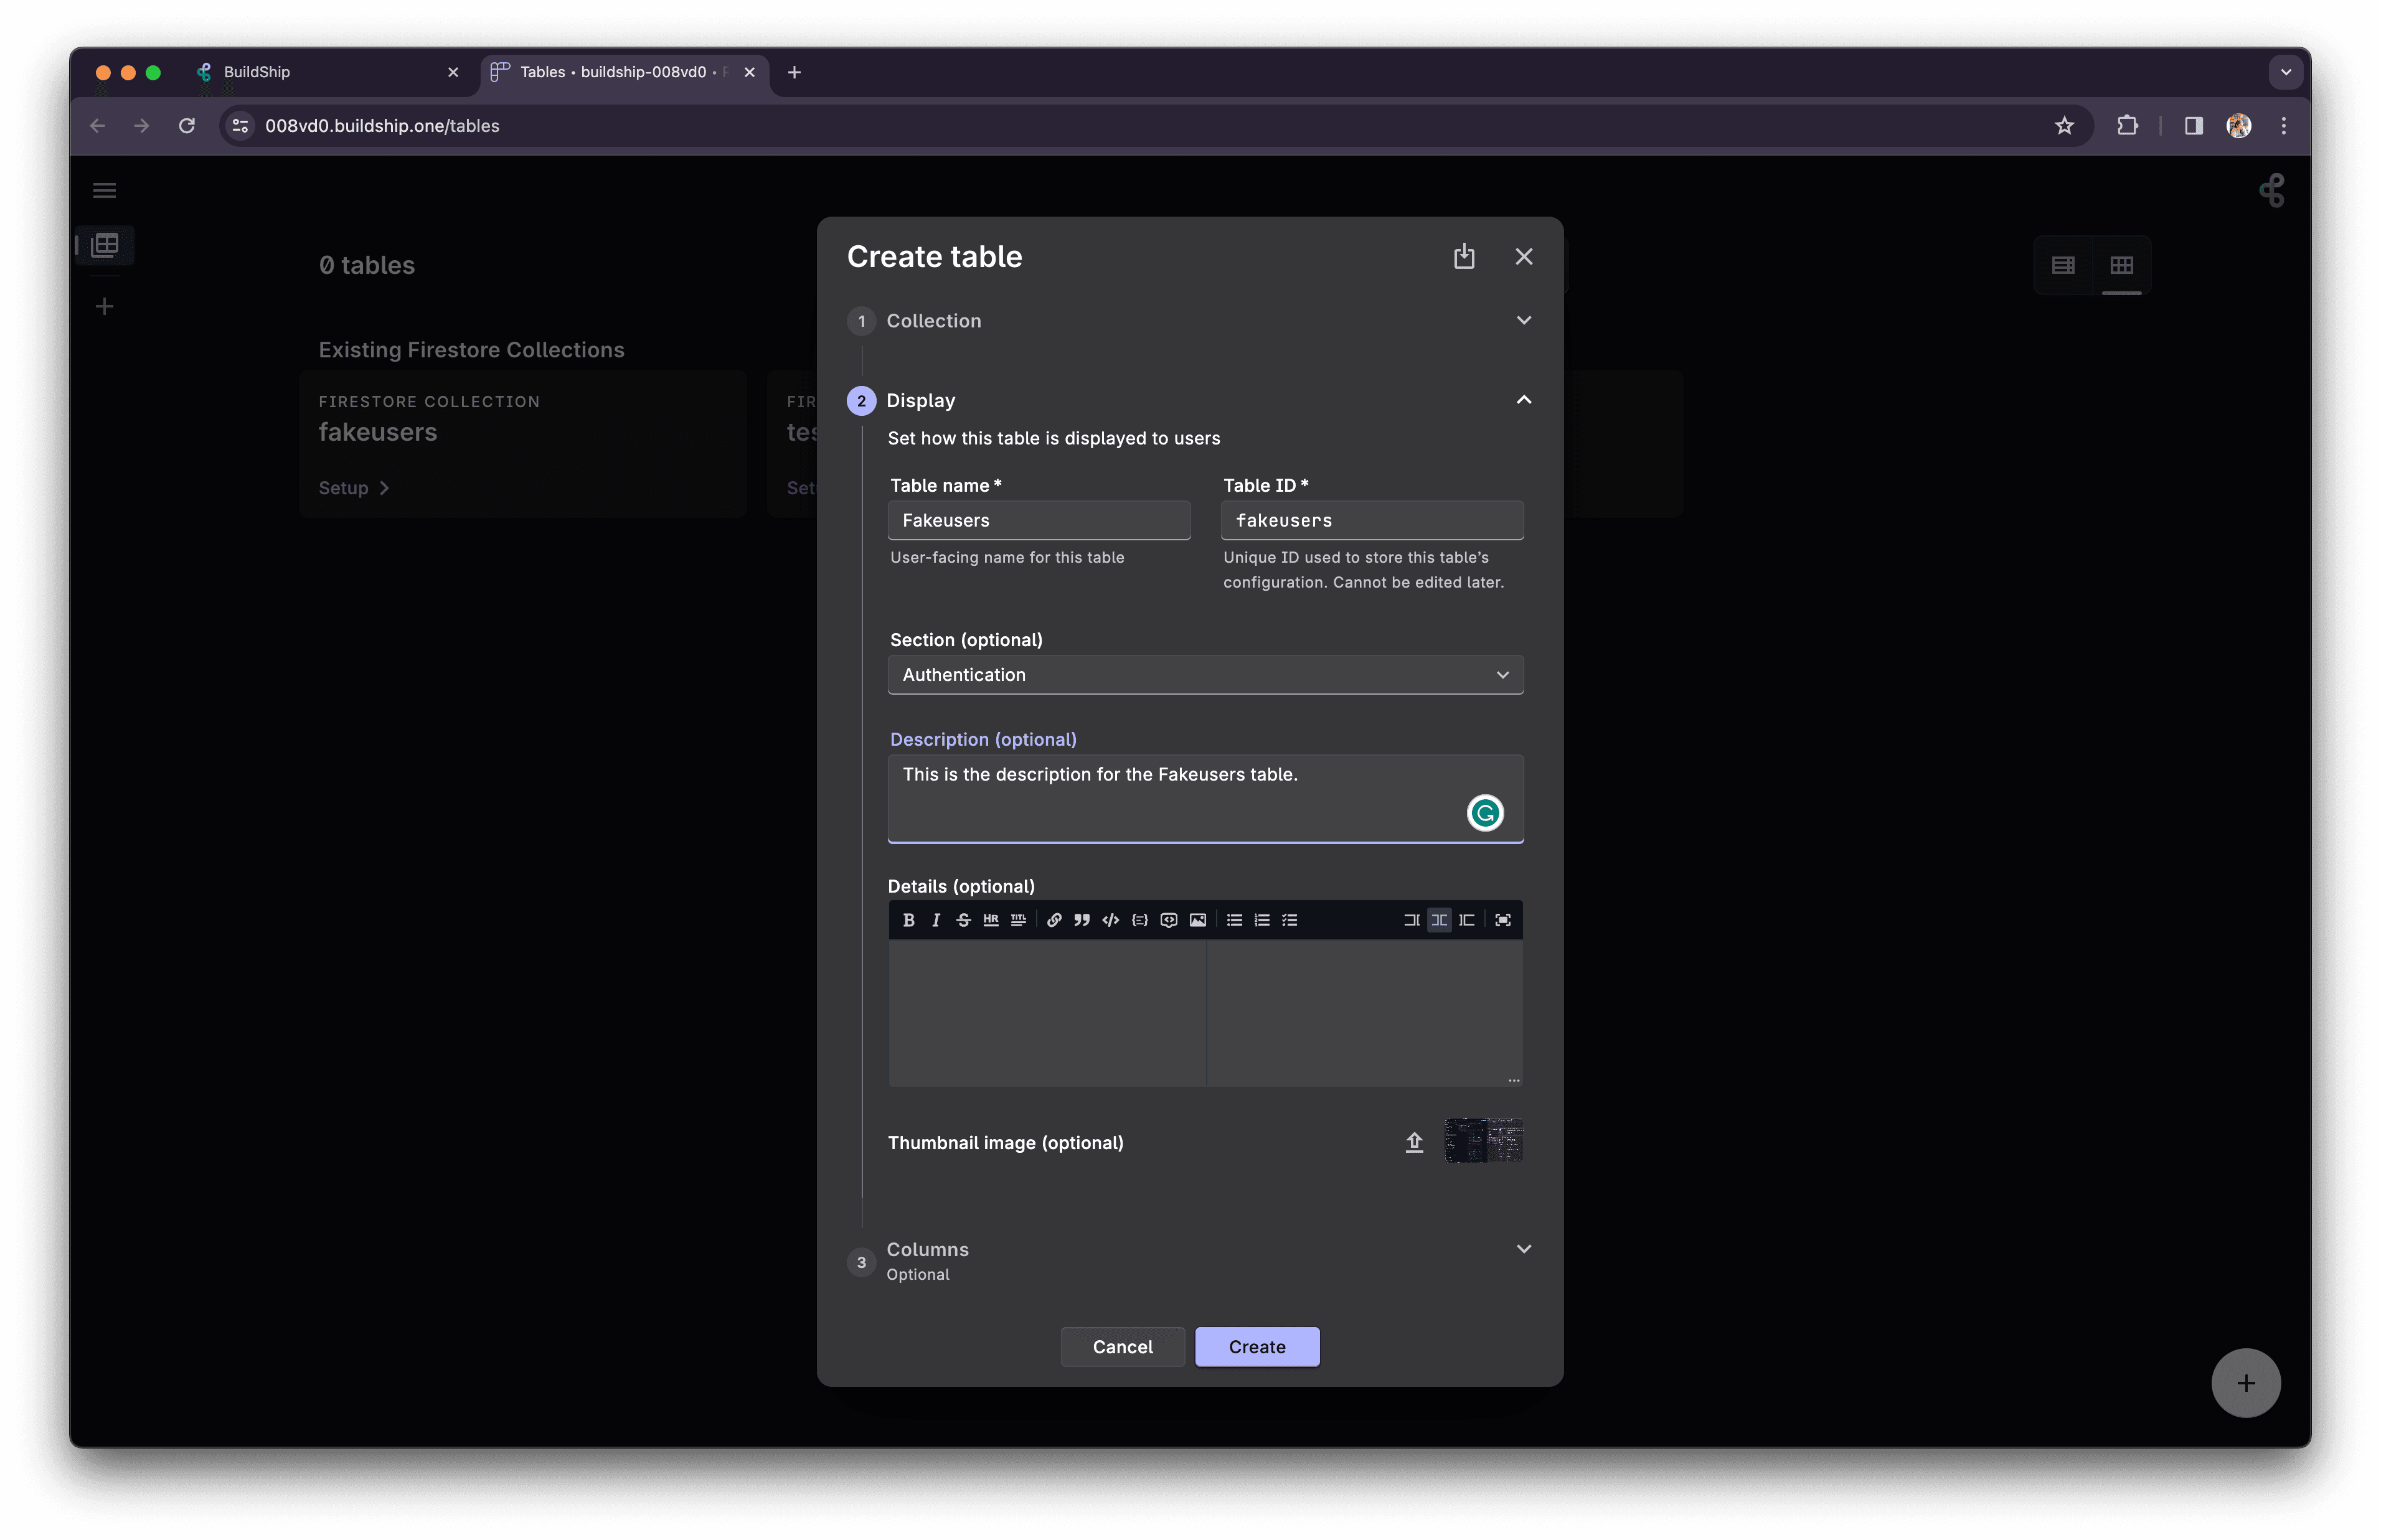
Select the table type, or leave it as default. Under the Display section, users can edit the Table Name and ID. Optionally create and select display sections, add description for easy access.
-
Under the Columns section, select the columns to initialize with the table. Click on Create.
-
Now a table will be initialized for the collection name provided. Click on “Import Existing Data” to import the data into your table.
-
Follow the step-by-step guided process to import your data and hit “Finish”.
Creating a new table
-
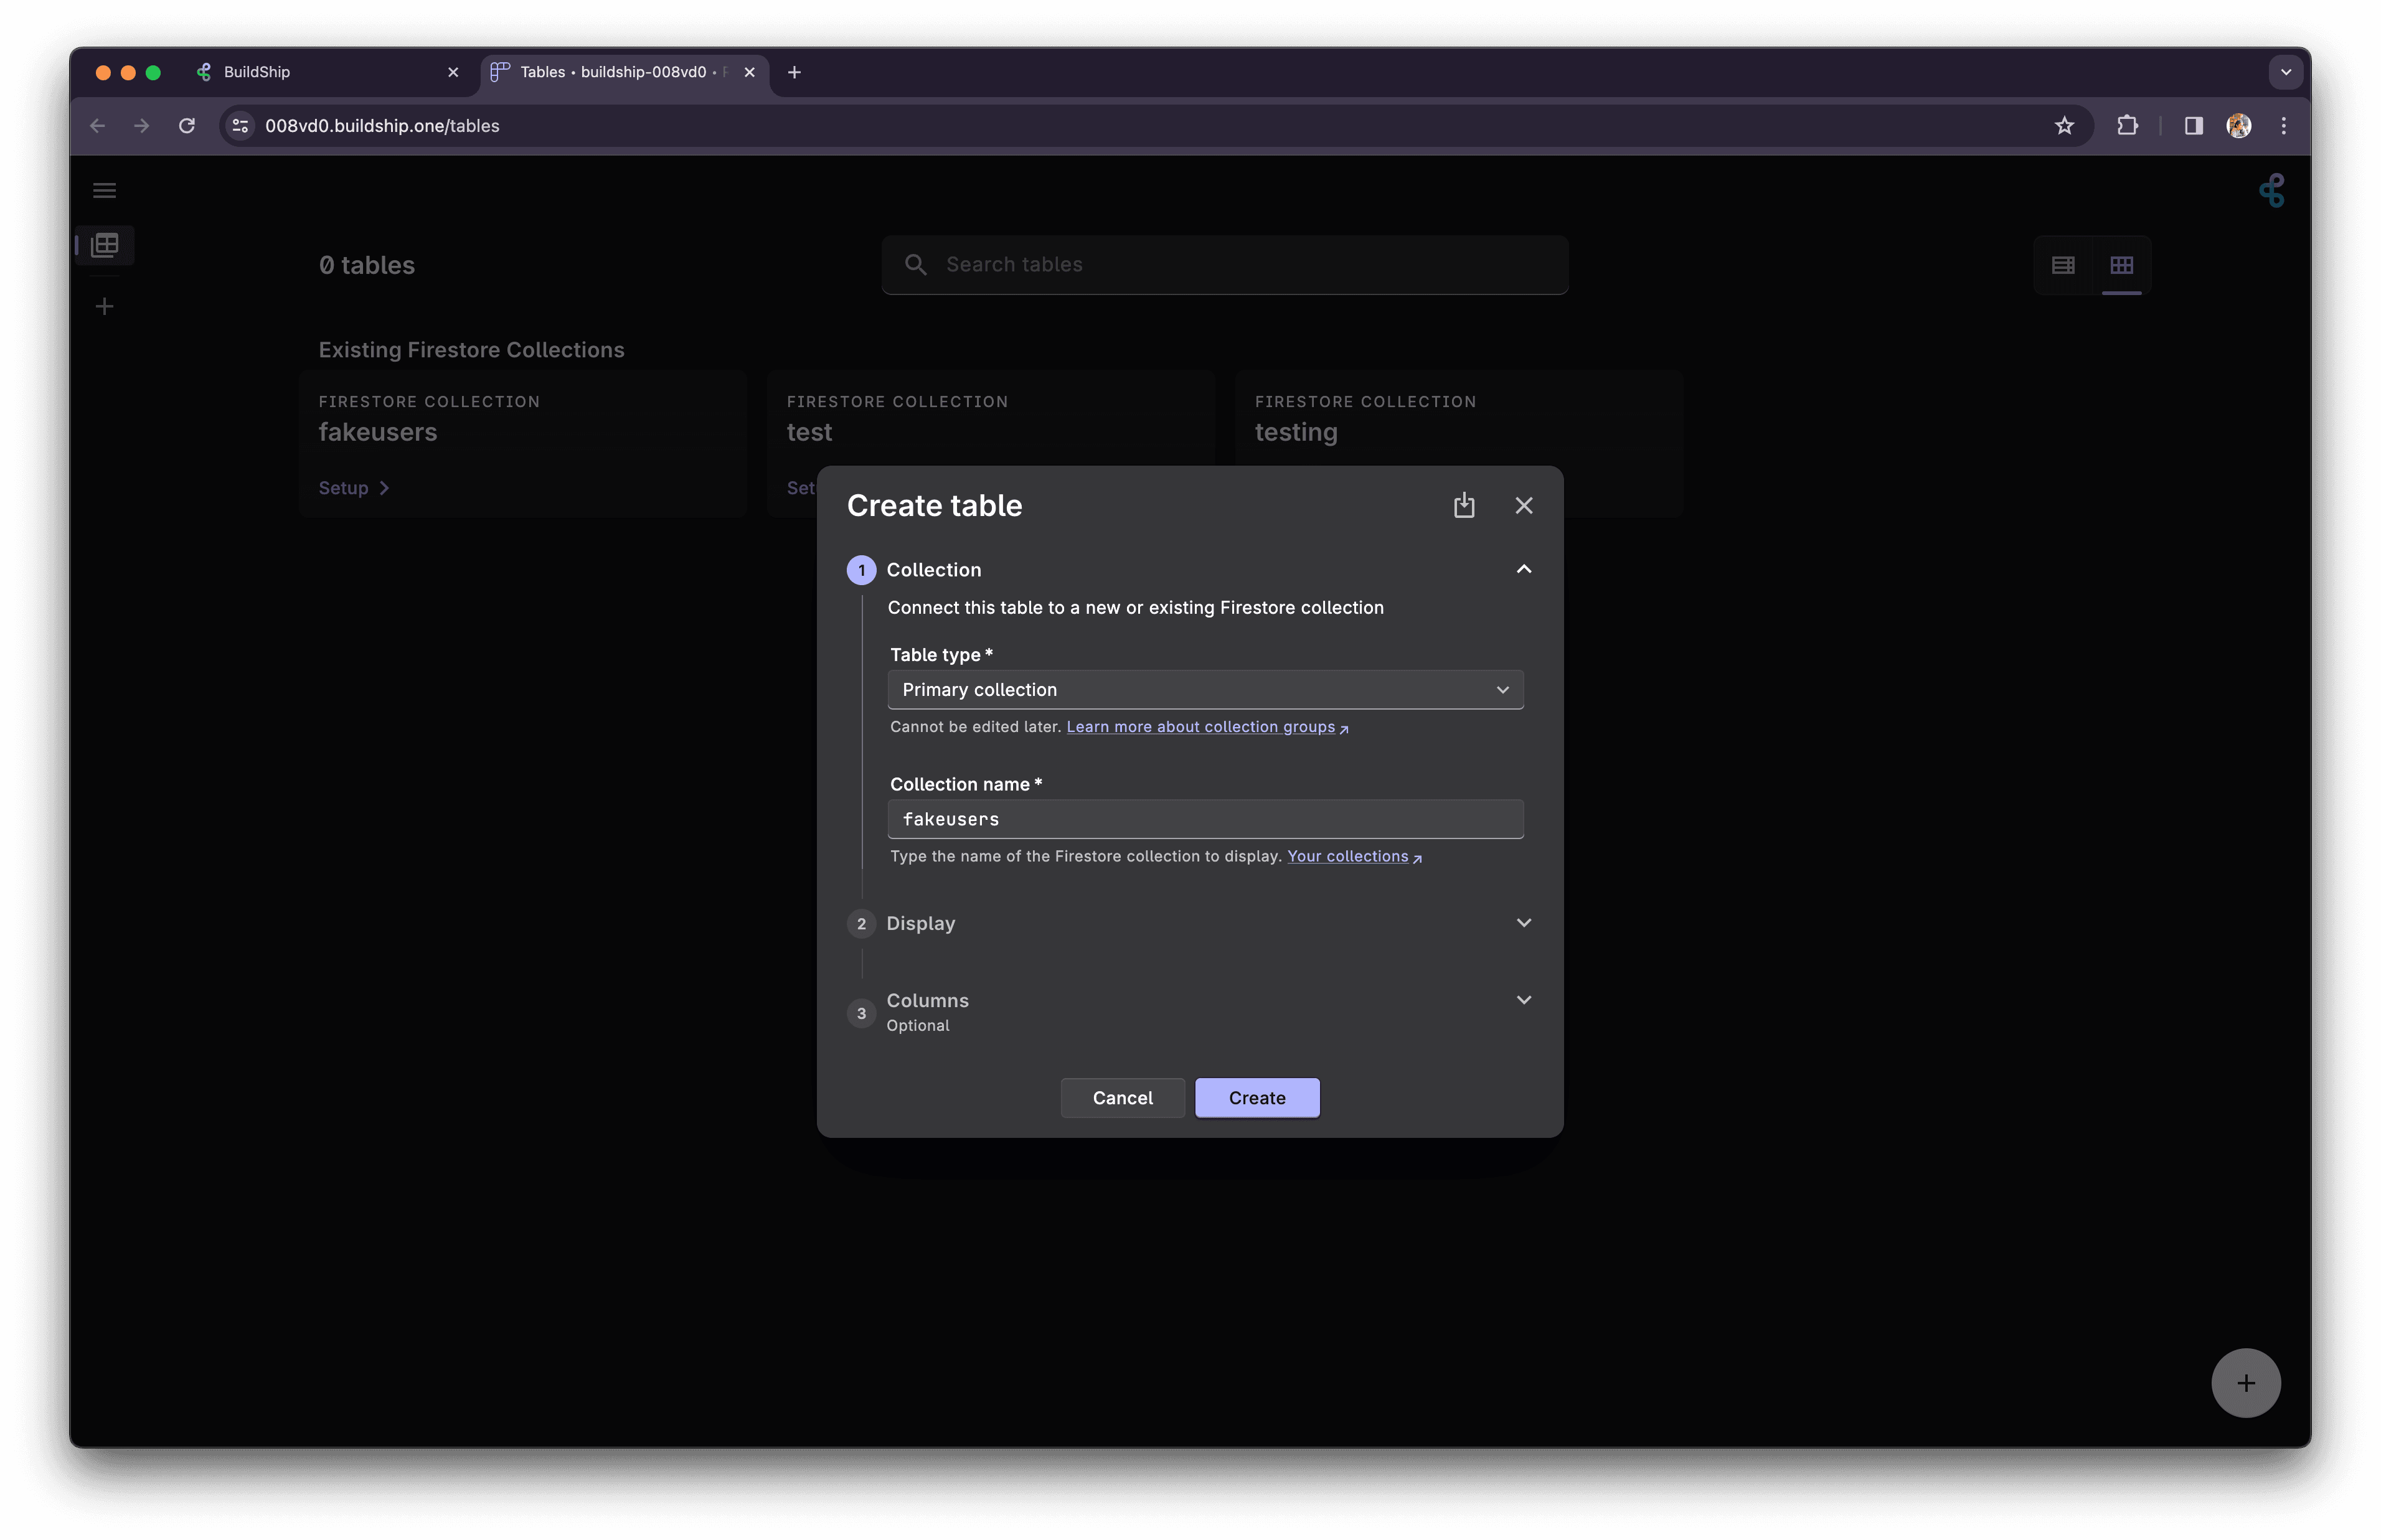
Once you’ve navigated to the “Databases” tab, click on the “Create Table” button. (or look for the ✚ icon on the bottom right corner to add a new table)
-
Select a Collection Name. You can also copy and paste the name of the collection used in your BuildShip Database Nodes to import the existing data in your table.
-
Optionally, you can add the display information for your table and select initial “Row ID” as the column. Users also have the option to quickly copy existing column data from any existing tables.
-
Click on “Create” to create the table.

Manipulating Table Data
There are two ways to manipulate the Firebase Collection data associated with your table.
Via BuildShip Table UI
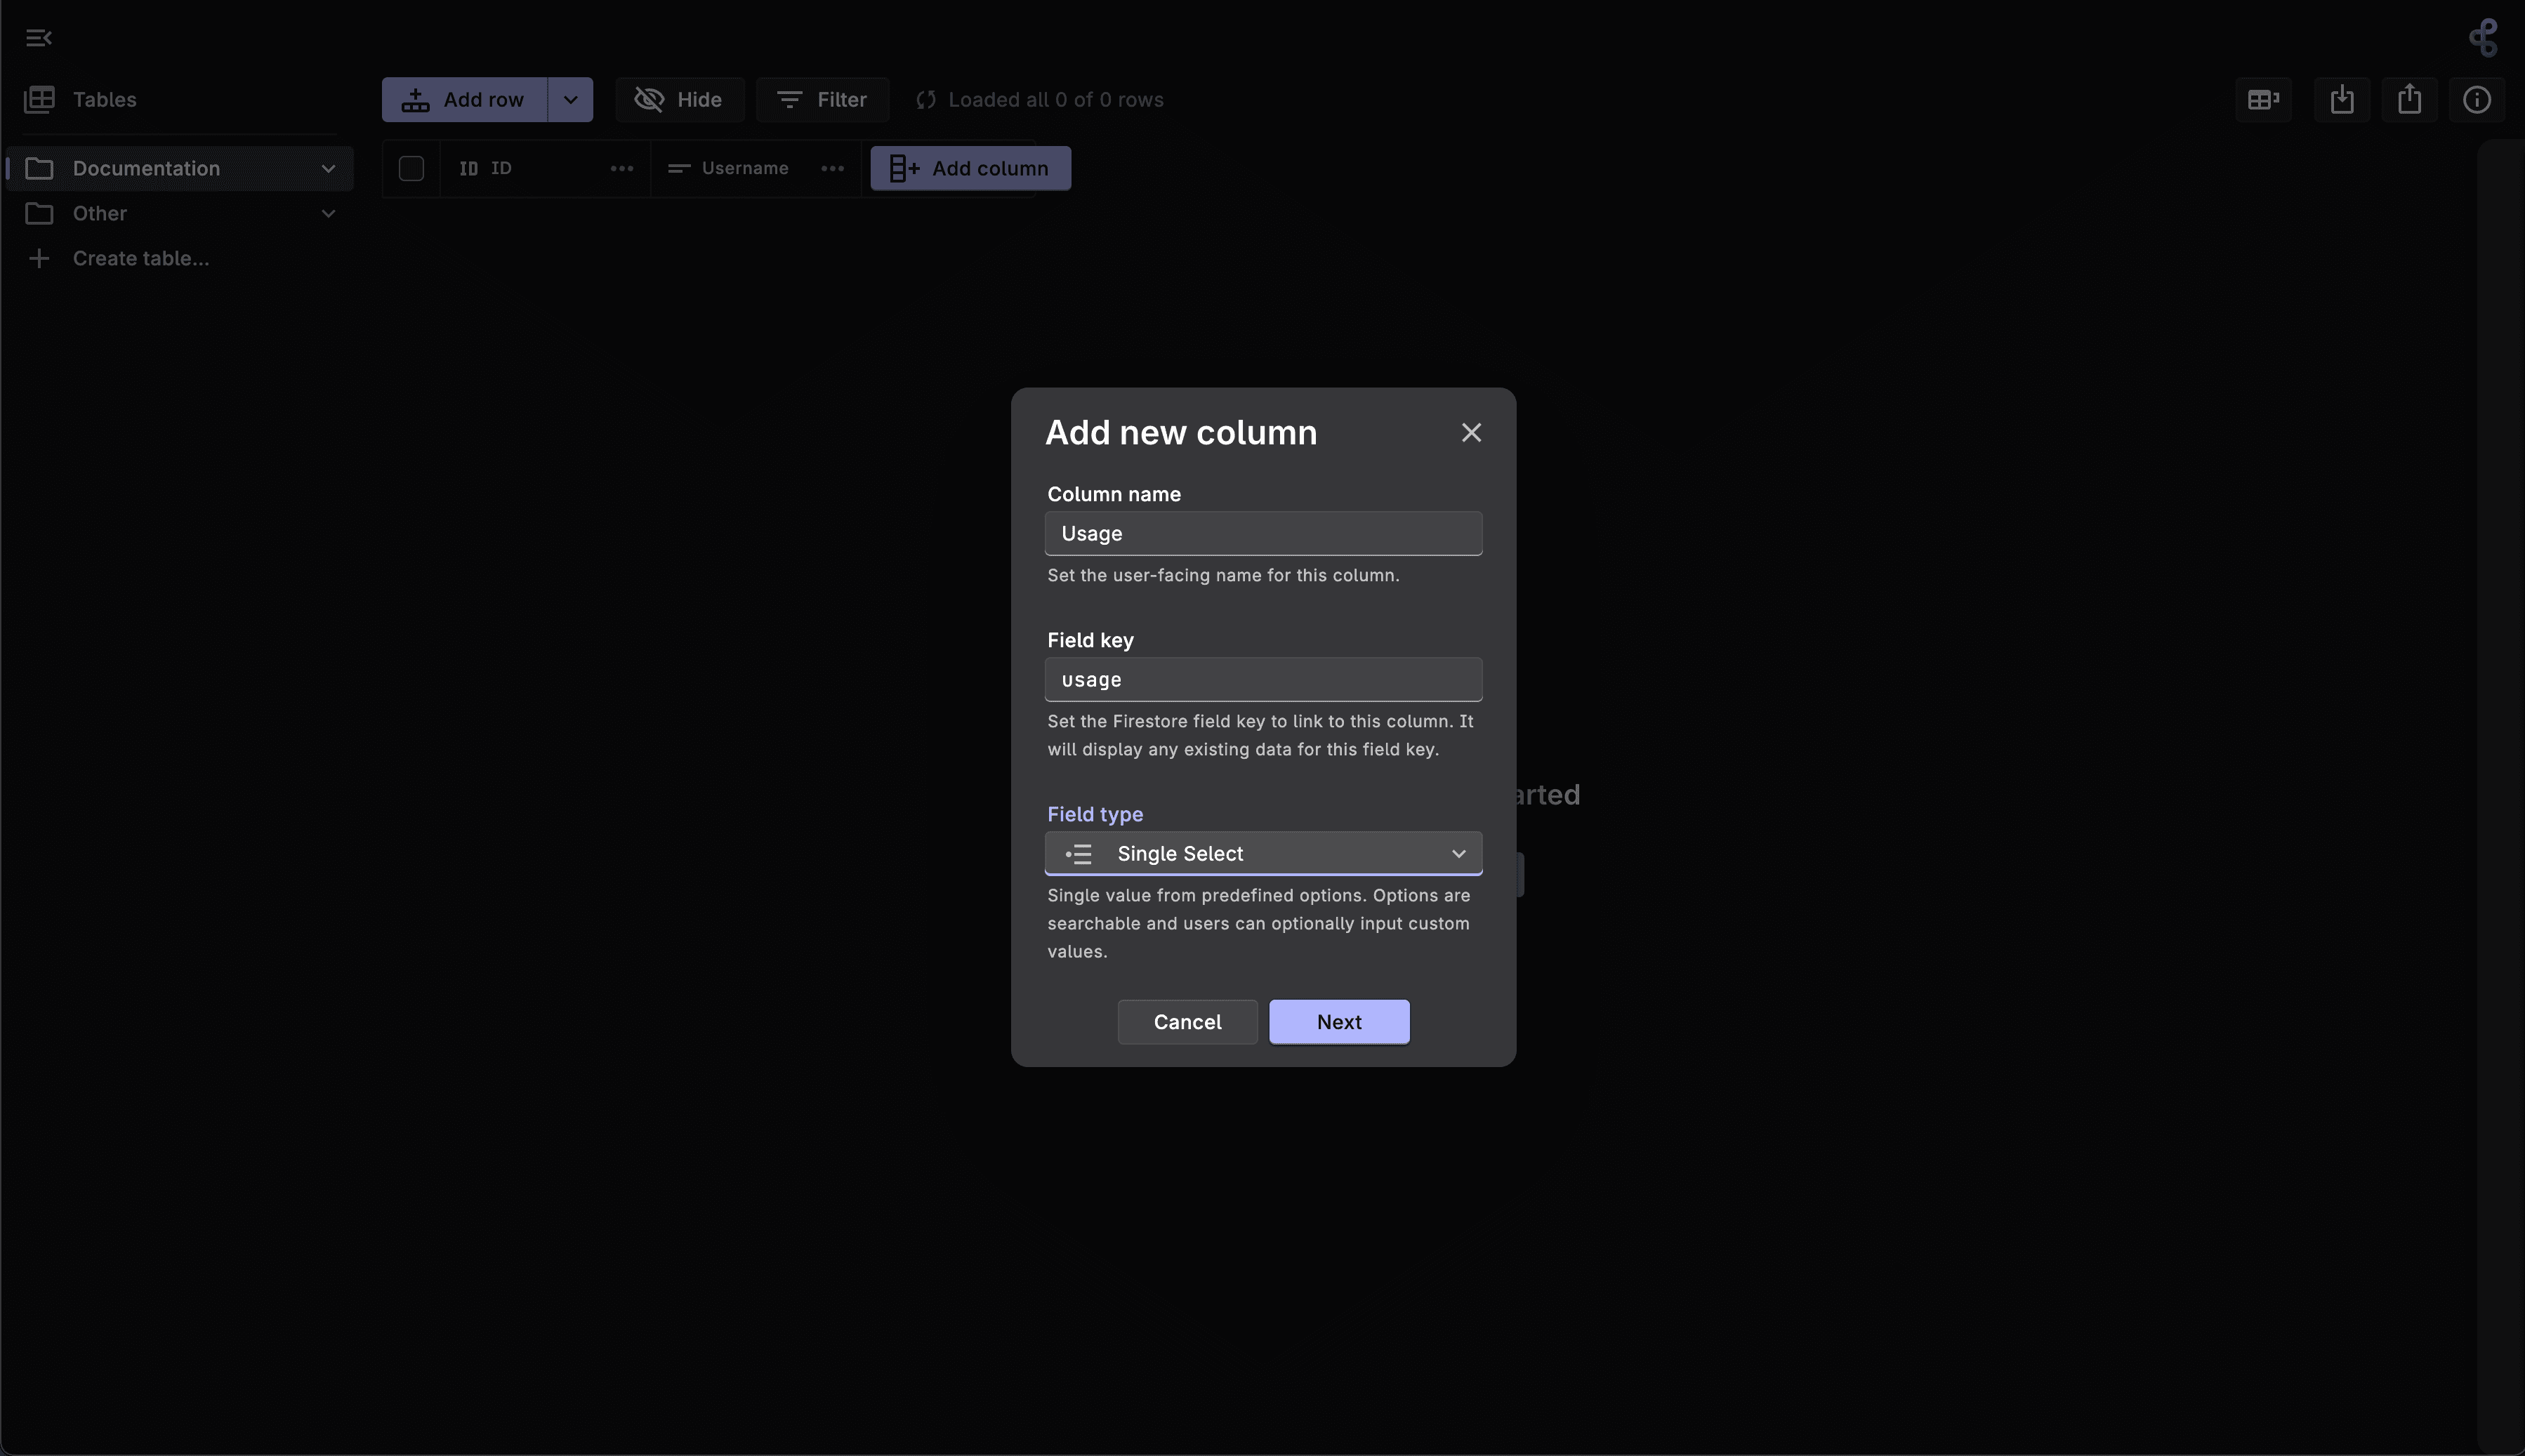
- In your empty table, click on “Add Column” button. Add in the Field Name, Field Key, and the Field Type.
If you already have existing fields in your collection, make sure to match the **Field Key value with your existing keys to sync data.
- Click on “Add Row” button to add values to your table.
Via BuildShip Database Nodes
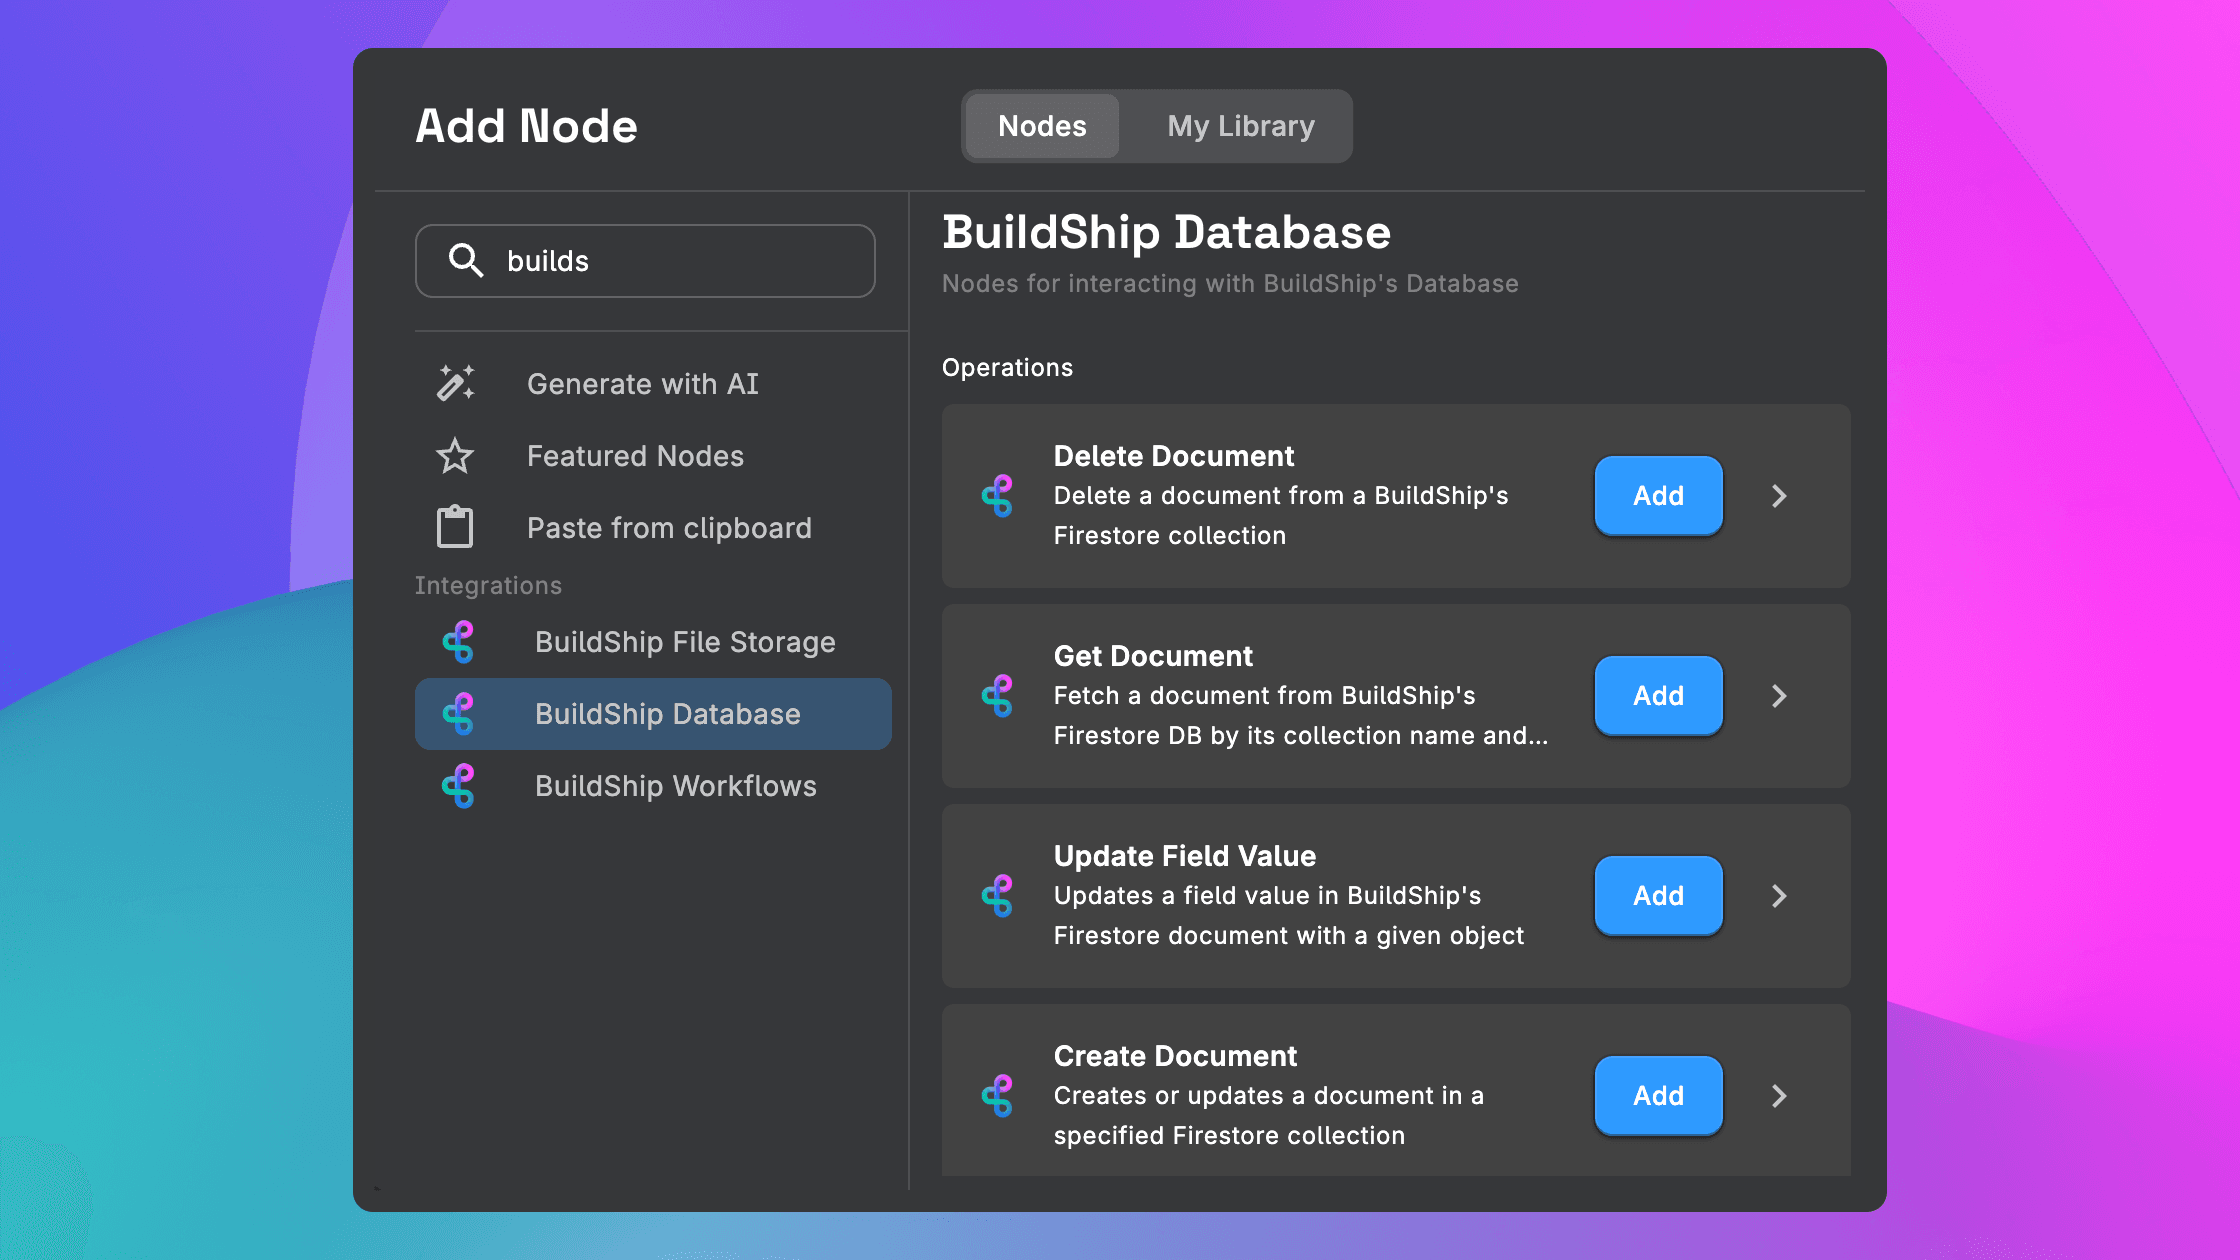
BuildShip has pre-built CRUD nodes available under the BuildShip Database Integrations section in the Node Library. These nodes are similar to the Firestore database nodes and are meant to help you insert, query, and manipulate your BuildShip Data.
In the next section, we’ll see how we can perform some basic operations on our data.
BuildShip Database Nodes
Let’s see how we can perform some basic operations and visualize them in our BuildShip Tables interface:
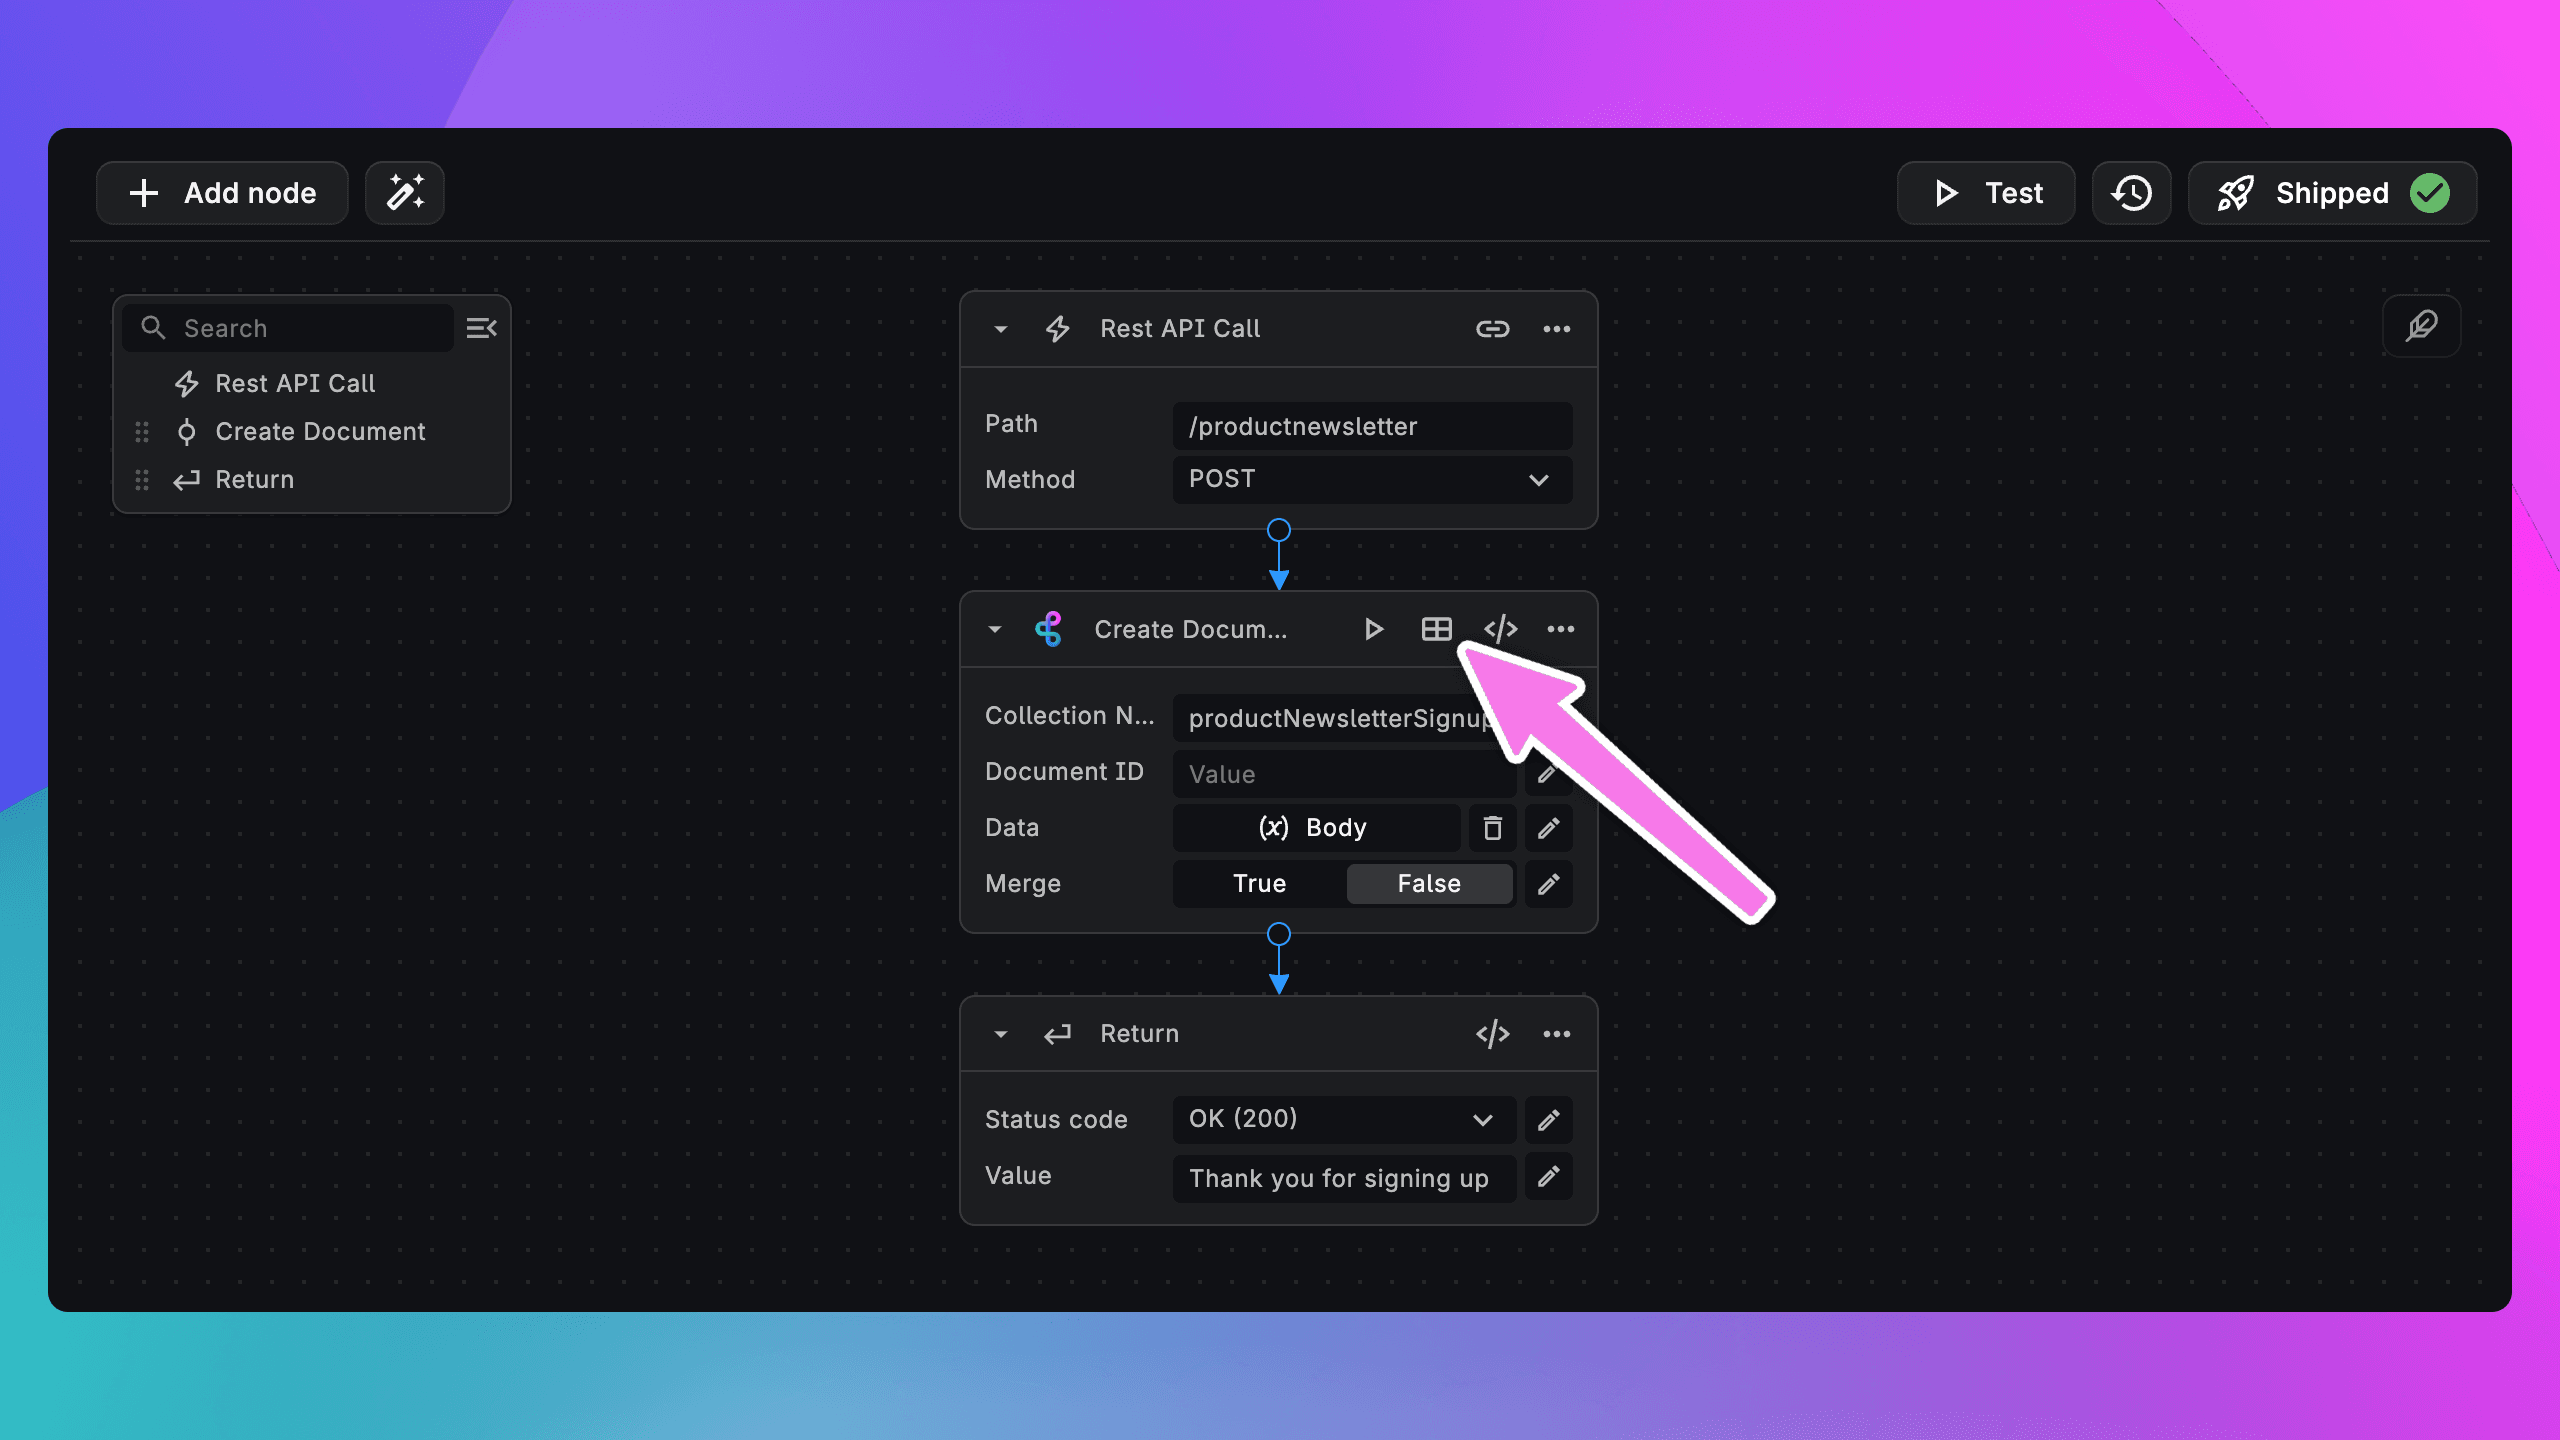
Creating Documents
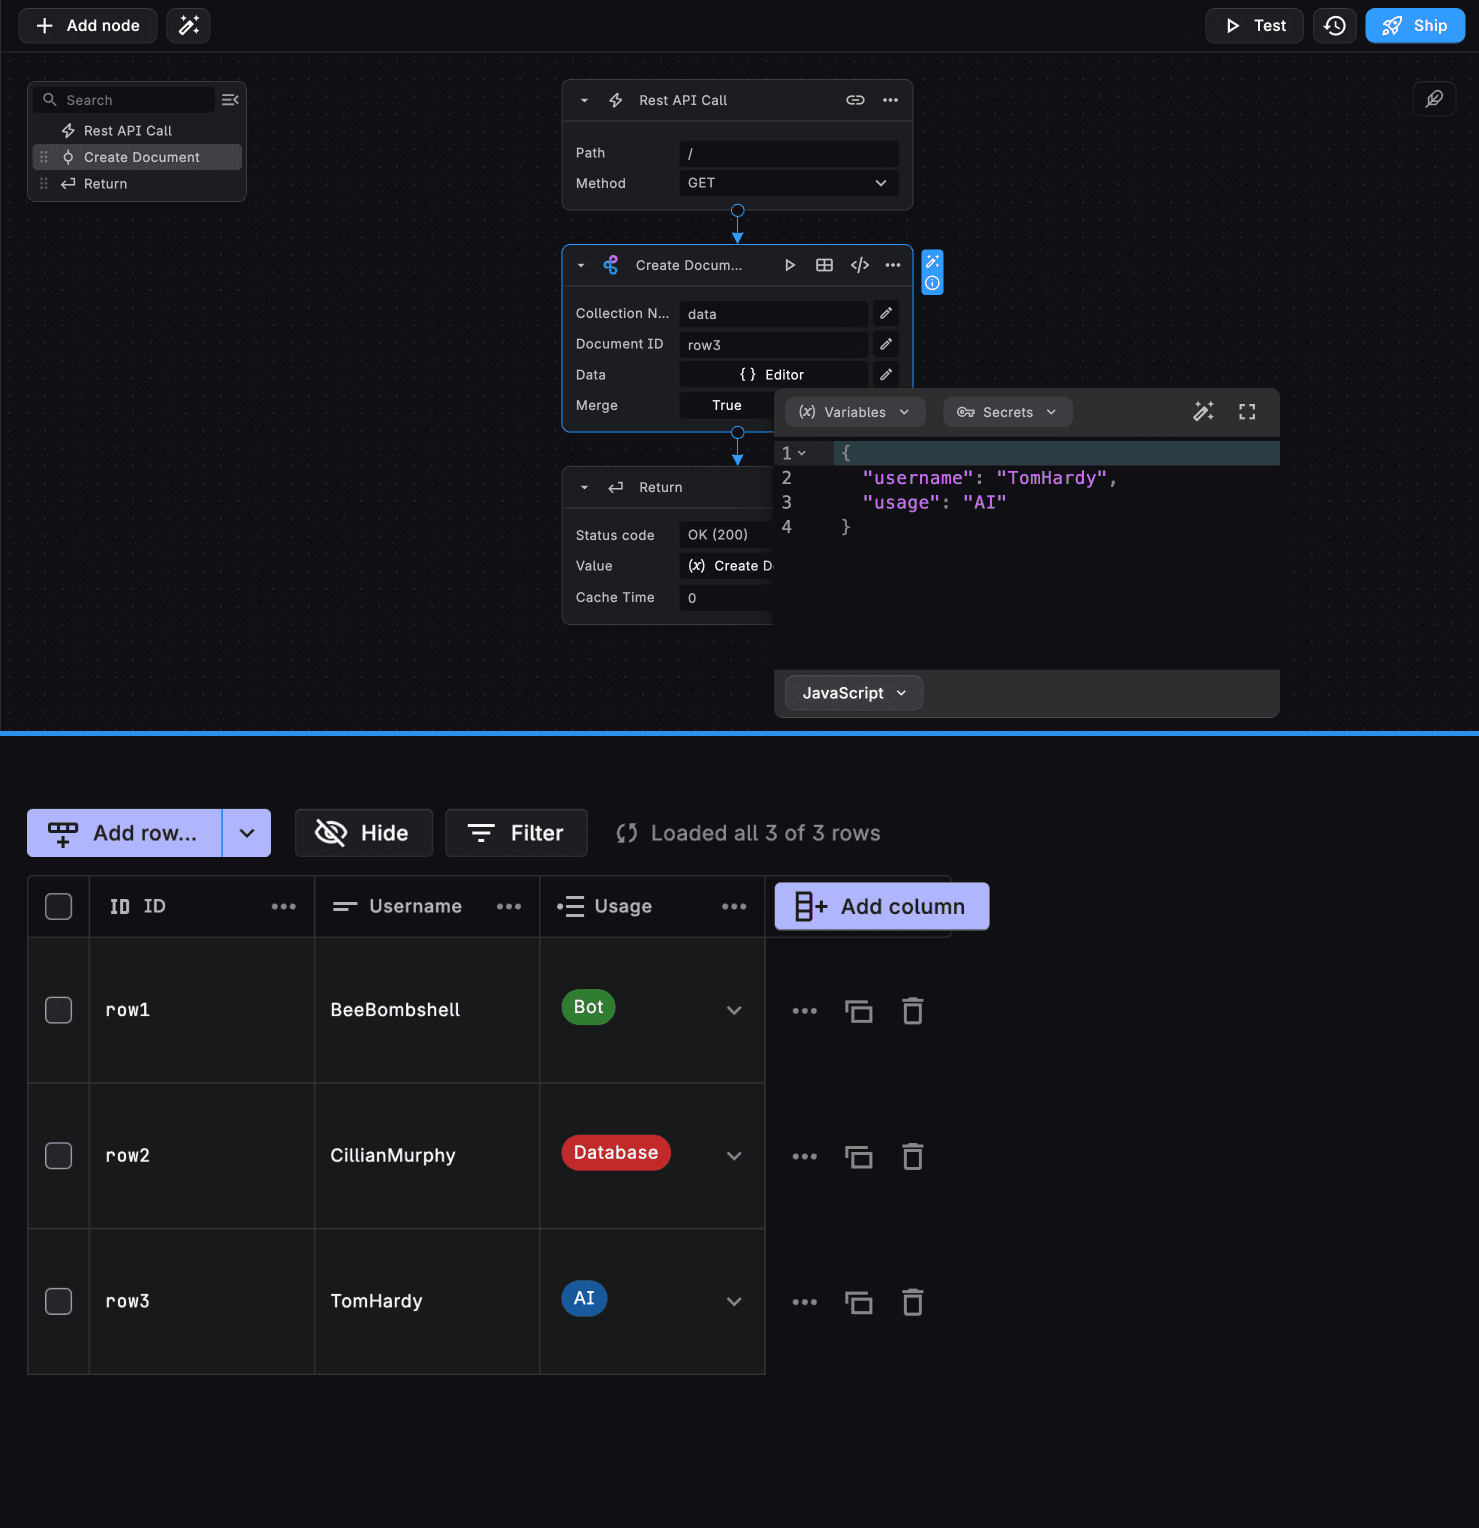
To create a document in a collection, we need to add the Create Document node from the BuildShip Database integration.
To test it out, let’s try to add the data in the collection connected to a BuildShip table. Add in the data as shown in the image below.
Querying Collection
To query a collection, we can use the Collection Query node from the BuildShip Database integration.
Add the collection name, same as the one linked to the BuildShip Table. For the Filters field, let’s copy the sample input available in the Node Info (ℹ️) and modify it according to our data.
[
  {
    "field": "username",
    "operator": "==",
    "value": "CillianMurphy"
  }
]
Next, let’s limit the number of responses being returned by specifying a limit and add a condition to order the results. For example:
[{ username: 'asc' }]; // order in ascending order by the username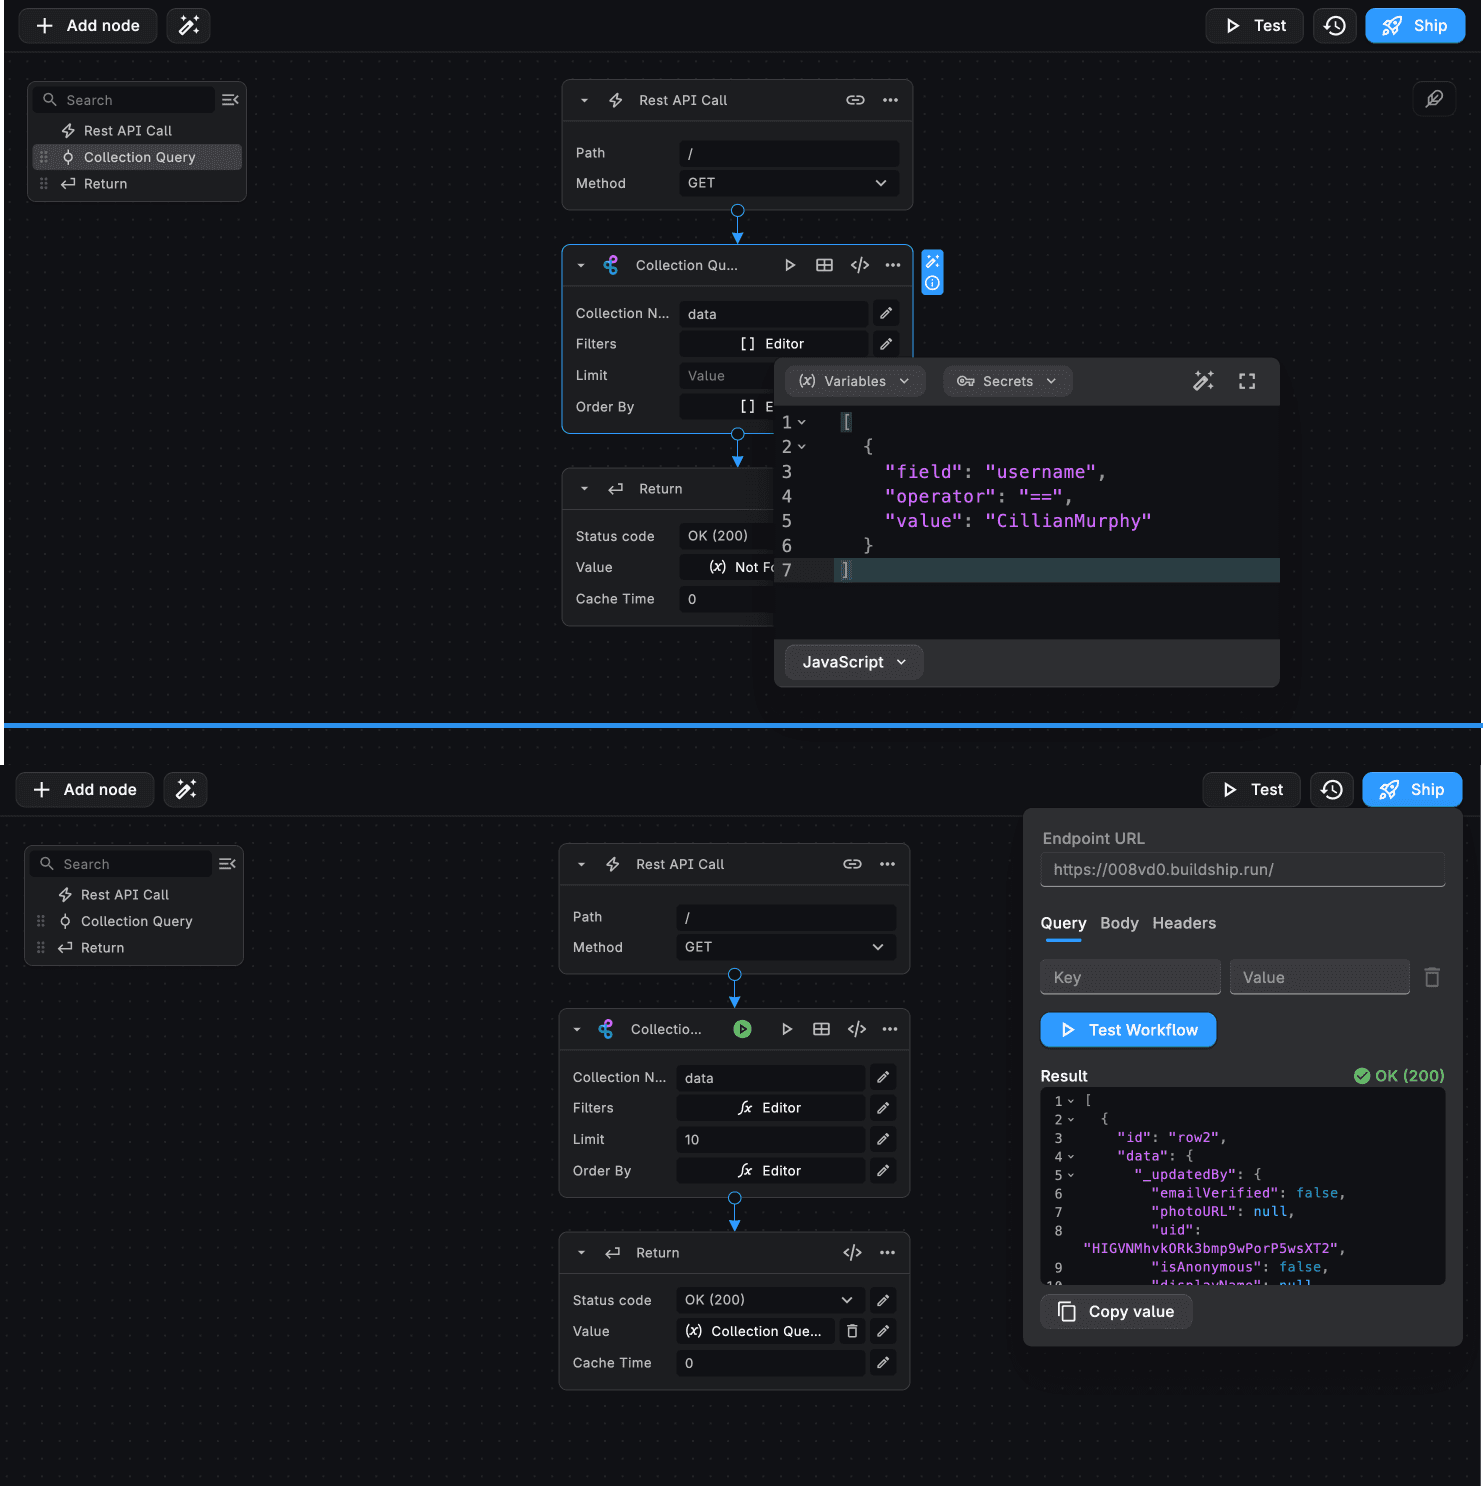
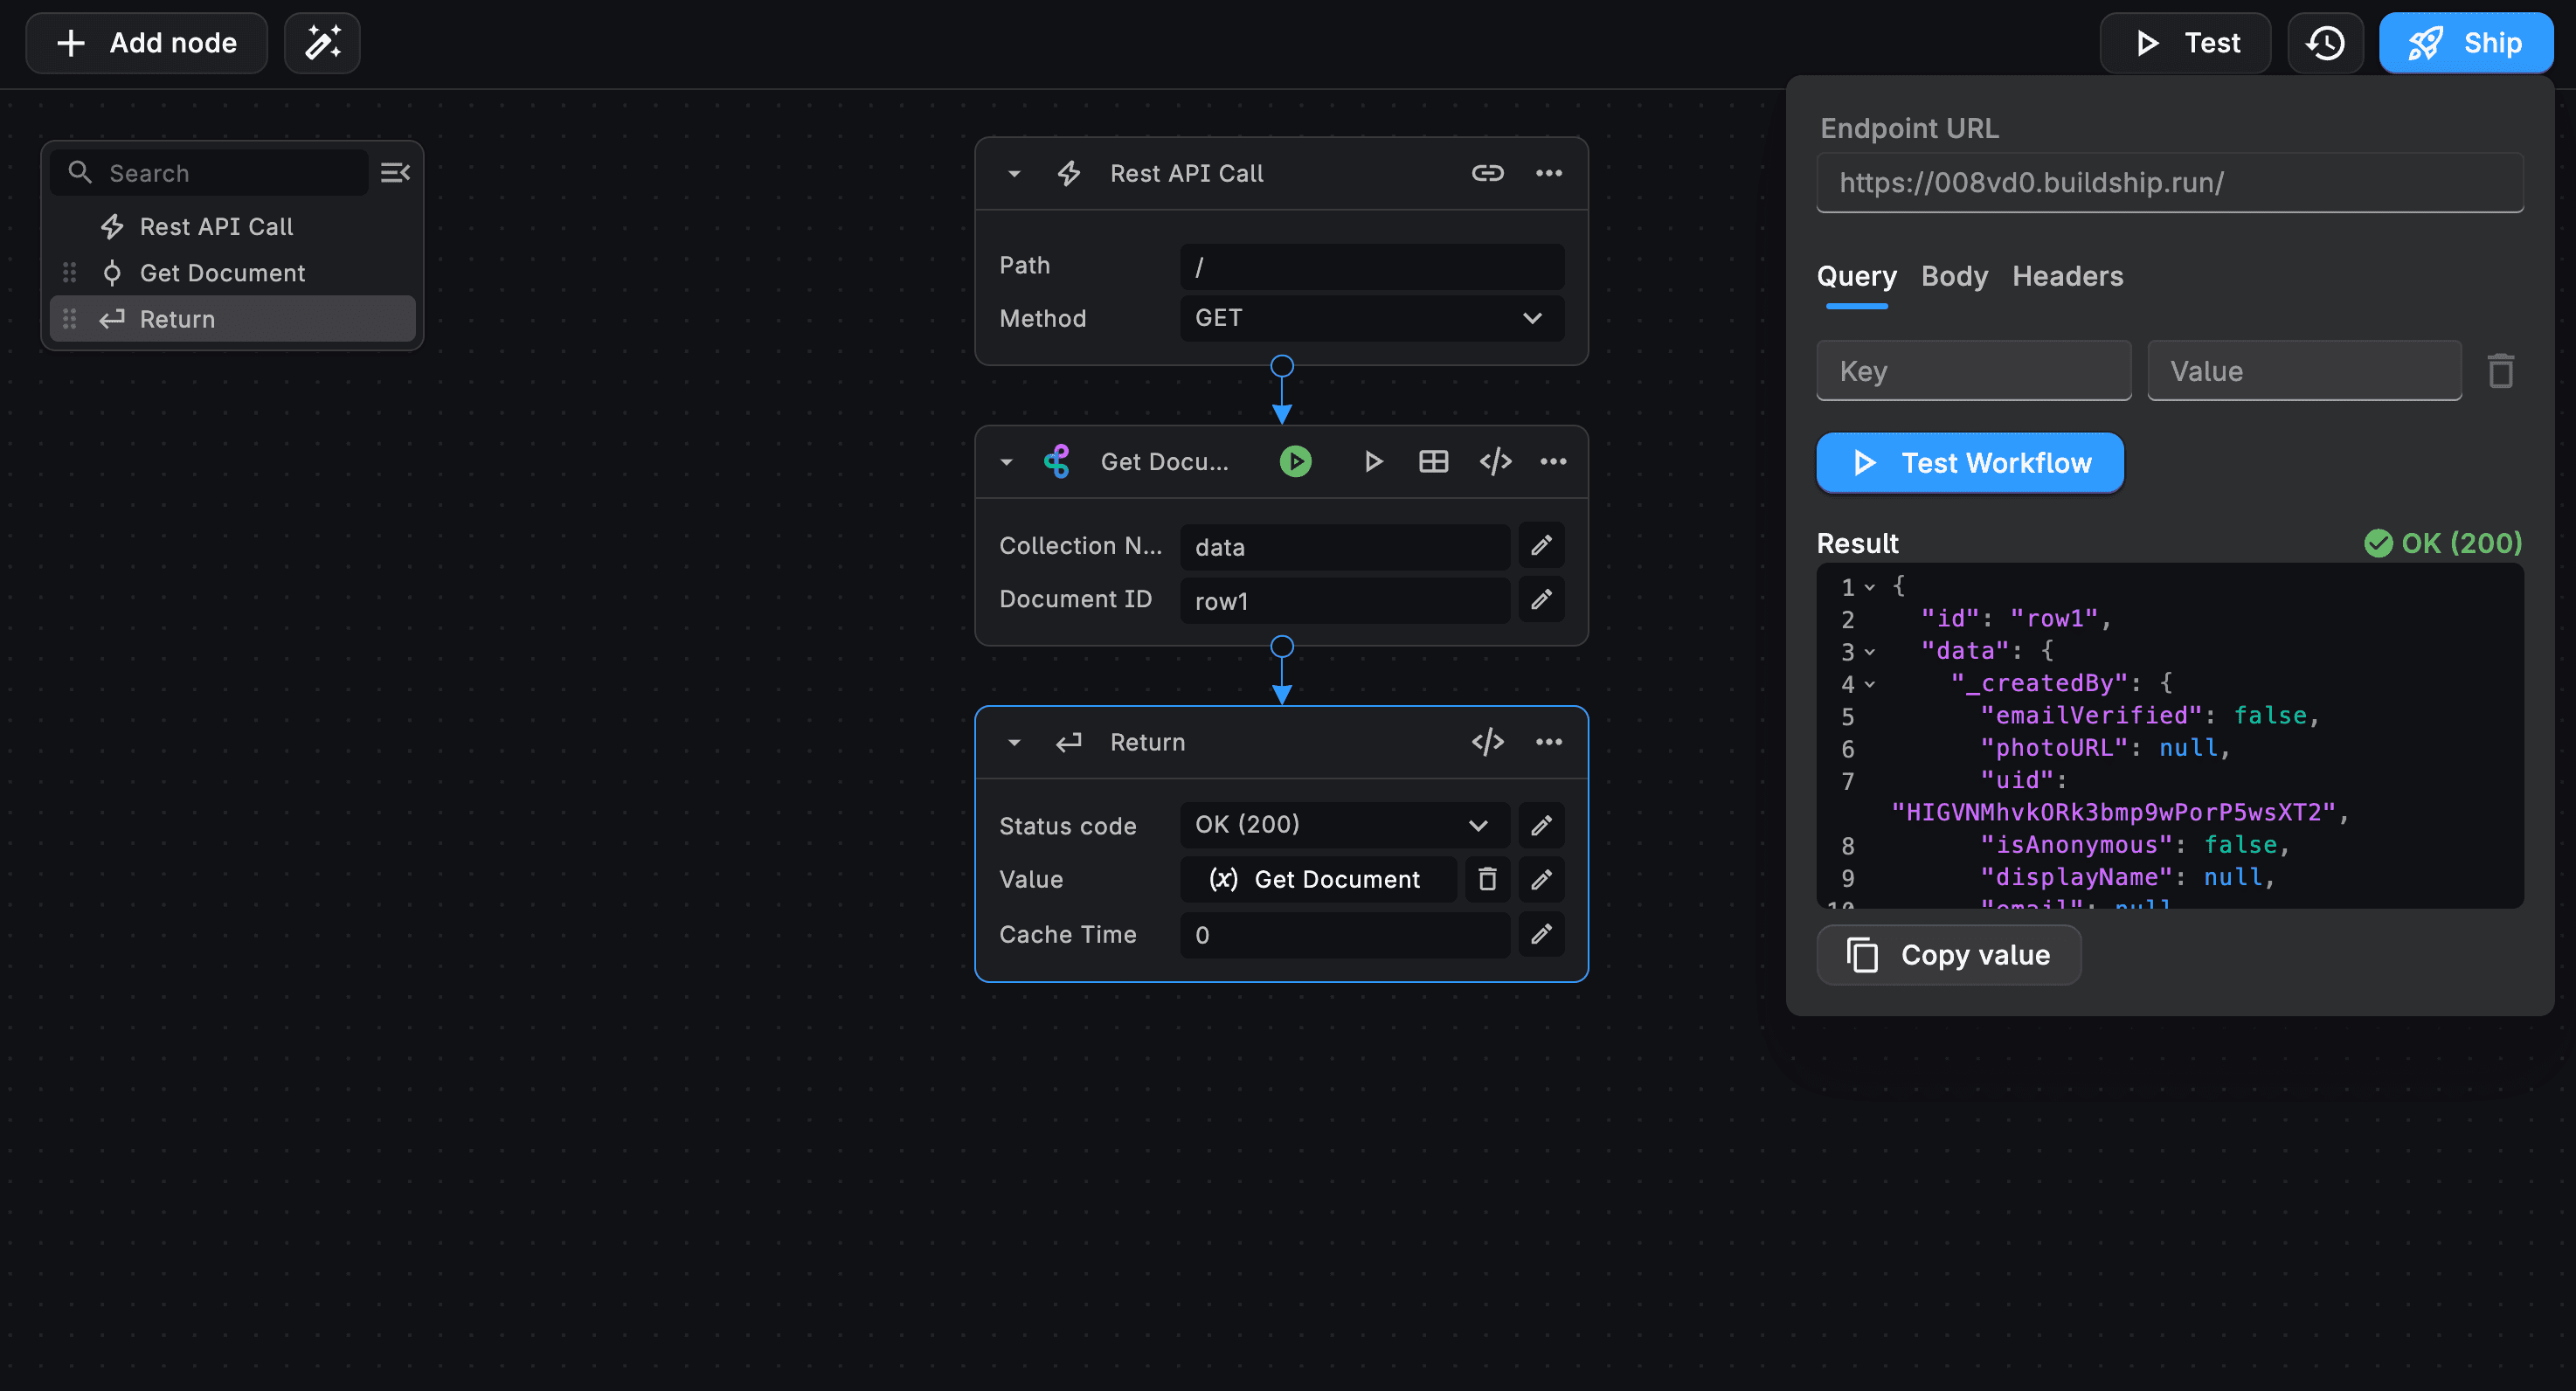
Get Document
To get a document from a collection, lets use the Get Documen node from the BuildShip Database integration.
Add in the Collection Name and the Document ID to retrieve.
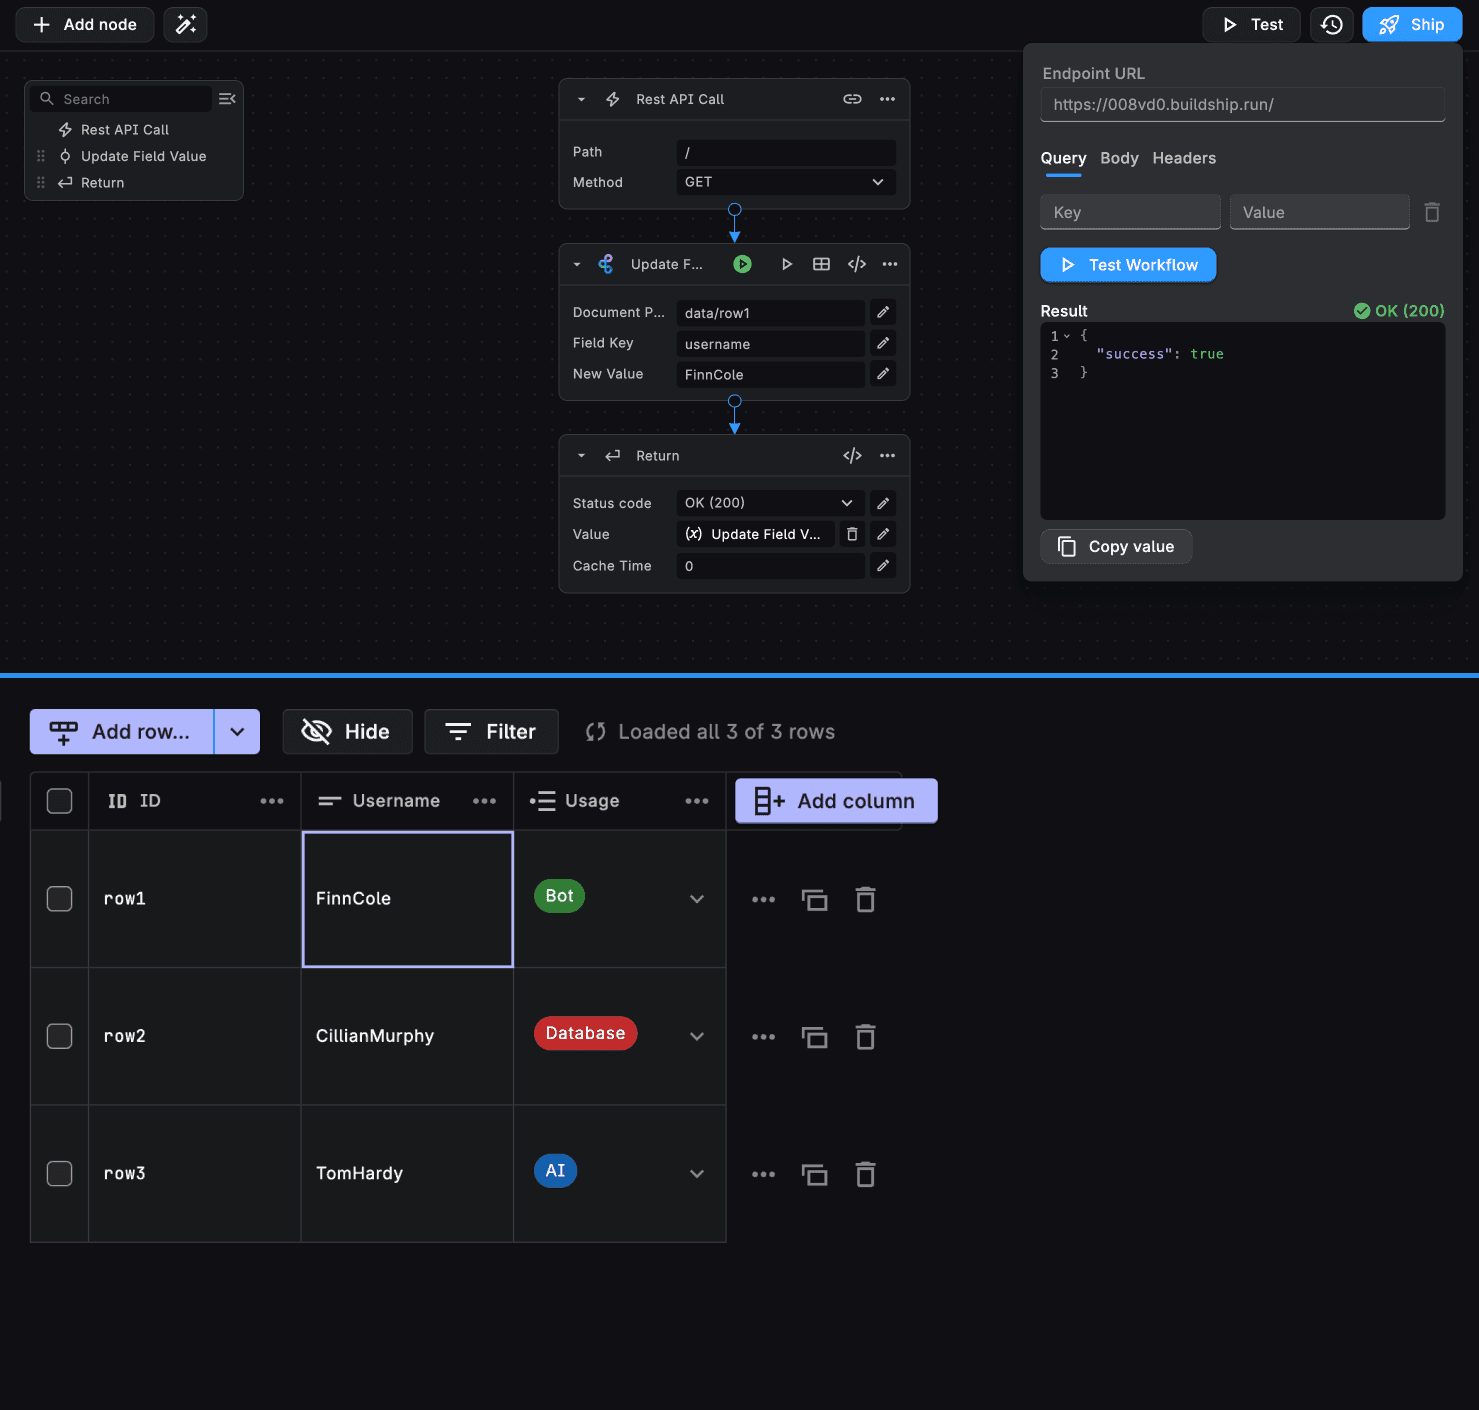
Updating Fields
To update a field in the document from a collection, lets use the Update Field Value node from the BuildShip Database integration.
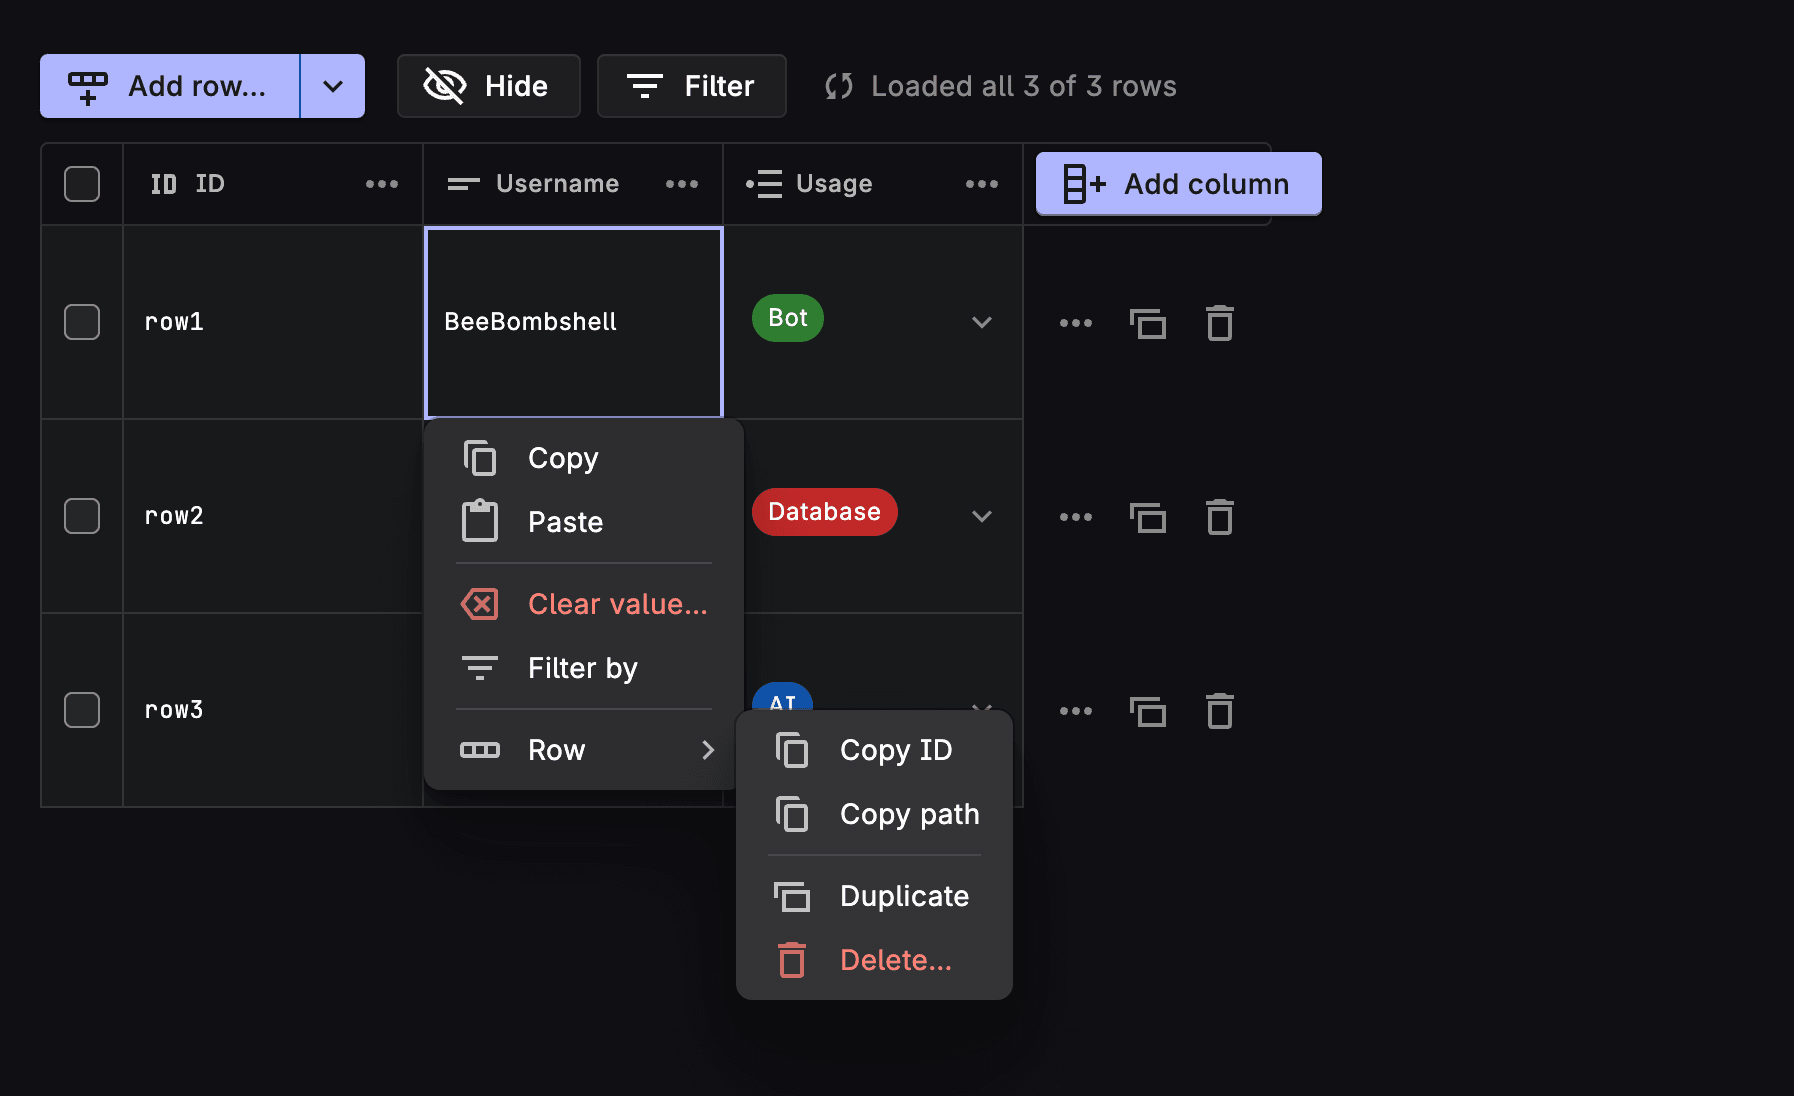
For this, we’d require the Document Path instead of the Collection Name and Document ID. To get the Document Path, let’s go to our BuildShip Table for the document we wish to update. Right click any value for that particular row and click on “Copy Path”.
Paste the copied document path in the input field. The Document Path is in the following format:
collectionName/DocumentIDAdd in the fieldName to update and the value to update.
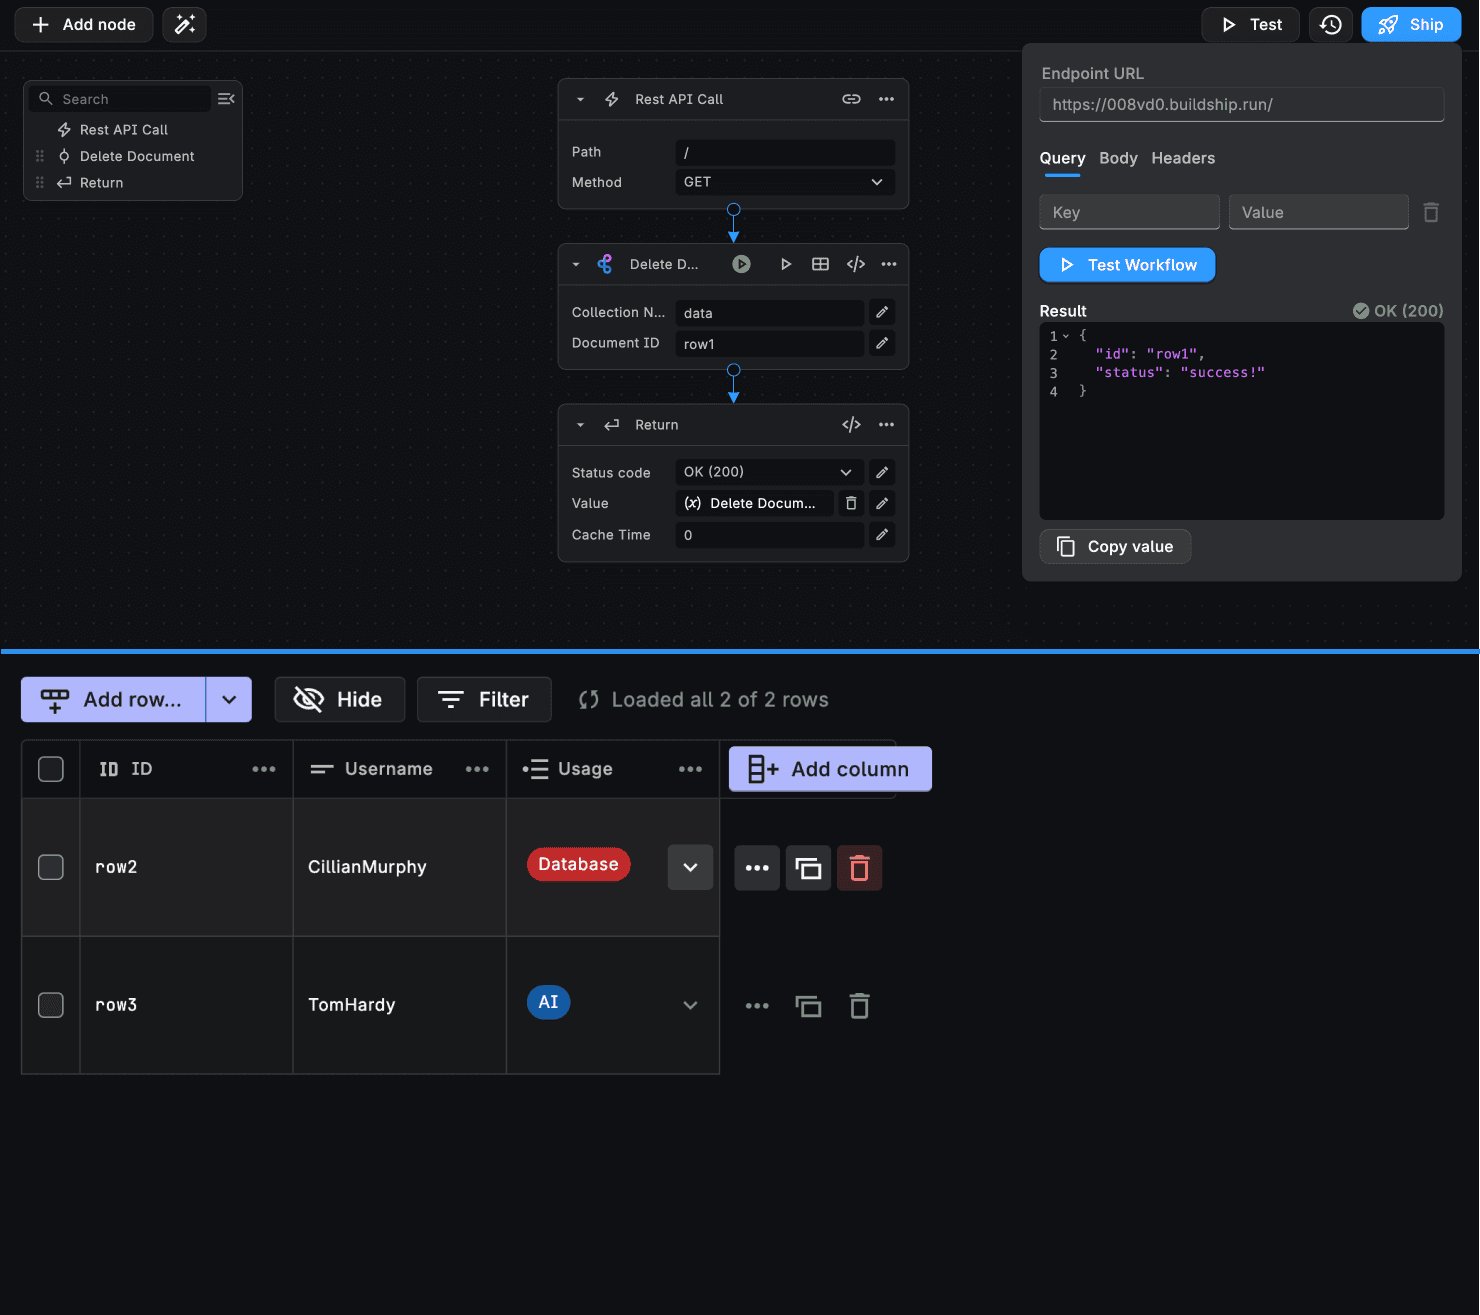
Delete Document
To update a field in the document from a collection, lets use the Delete Document node from the BuildShip Database integration.
Add in the Collection Name and the Document ID of the document to delete.